| Site Info: | Favorites: | C++: | Fun: | Newer Stuff: | Old Fun: | Old Tech: | Old Other: |
| News | Rating System | MinGW Distro | Image Hacking | SF Reviews | Origami Polyhedra | bwtzip | Quotations |
| Stephan T. Lavavej | Paper Airplane | Random Work | Book Reviews | ||||
| Deus Ex | PNG | Downloads | |||||
| Anime/SF | Mersenne Primes | Wallpaper | |||||
| Foundation | Diet |
| Wallpapers: | Tracing: | From Scratch: | Hacking: | Coloring: |
| Carina | Theresa | Stars | OMF 2097 | Kimiko |
| Orion | GCC | Petersen | Arbalest | Dark Looks |
| HyperThreading | Pirokomatic | |||
| Endgames Turning |
|
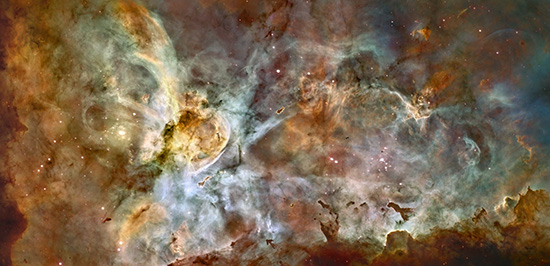
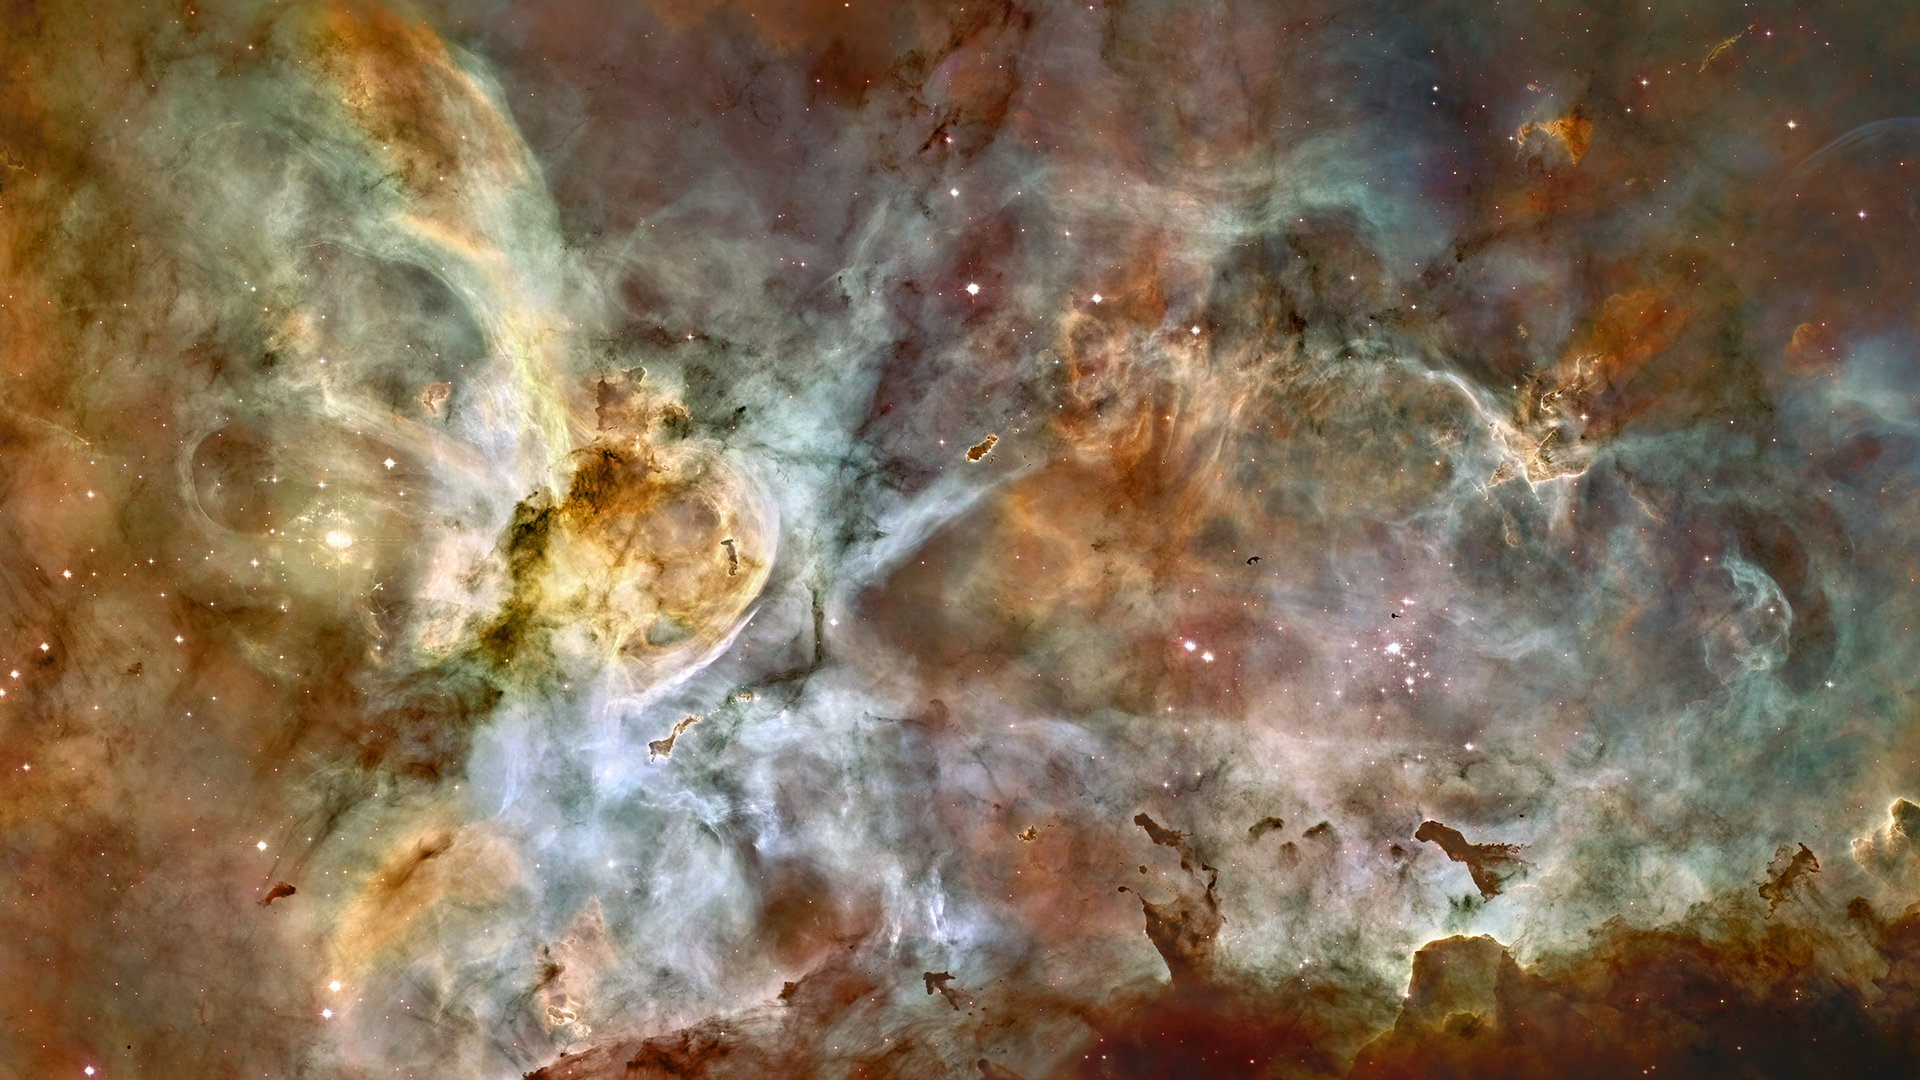
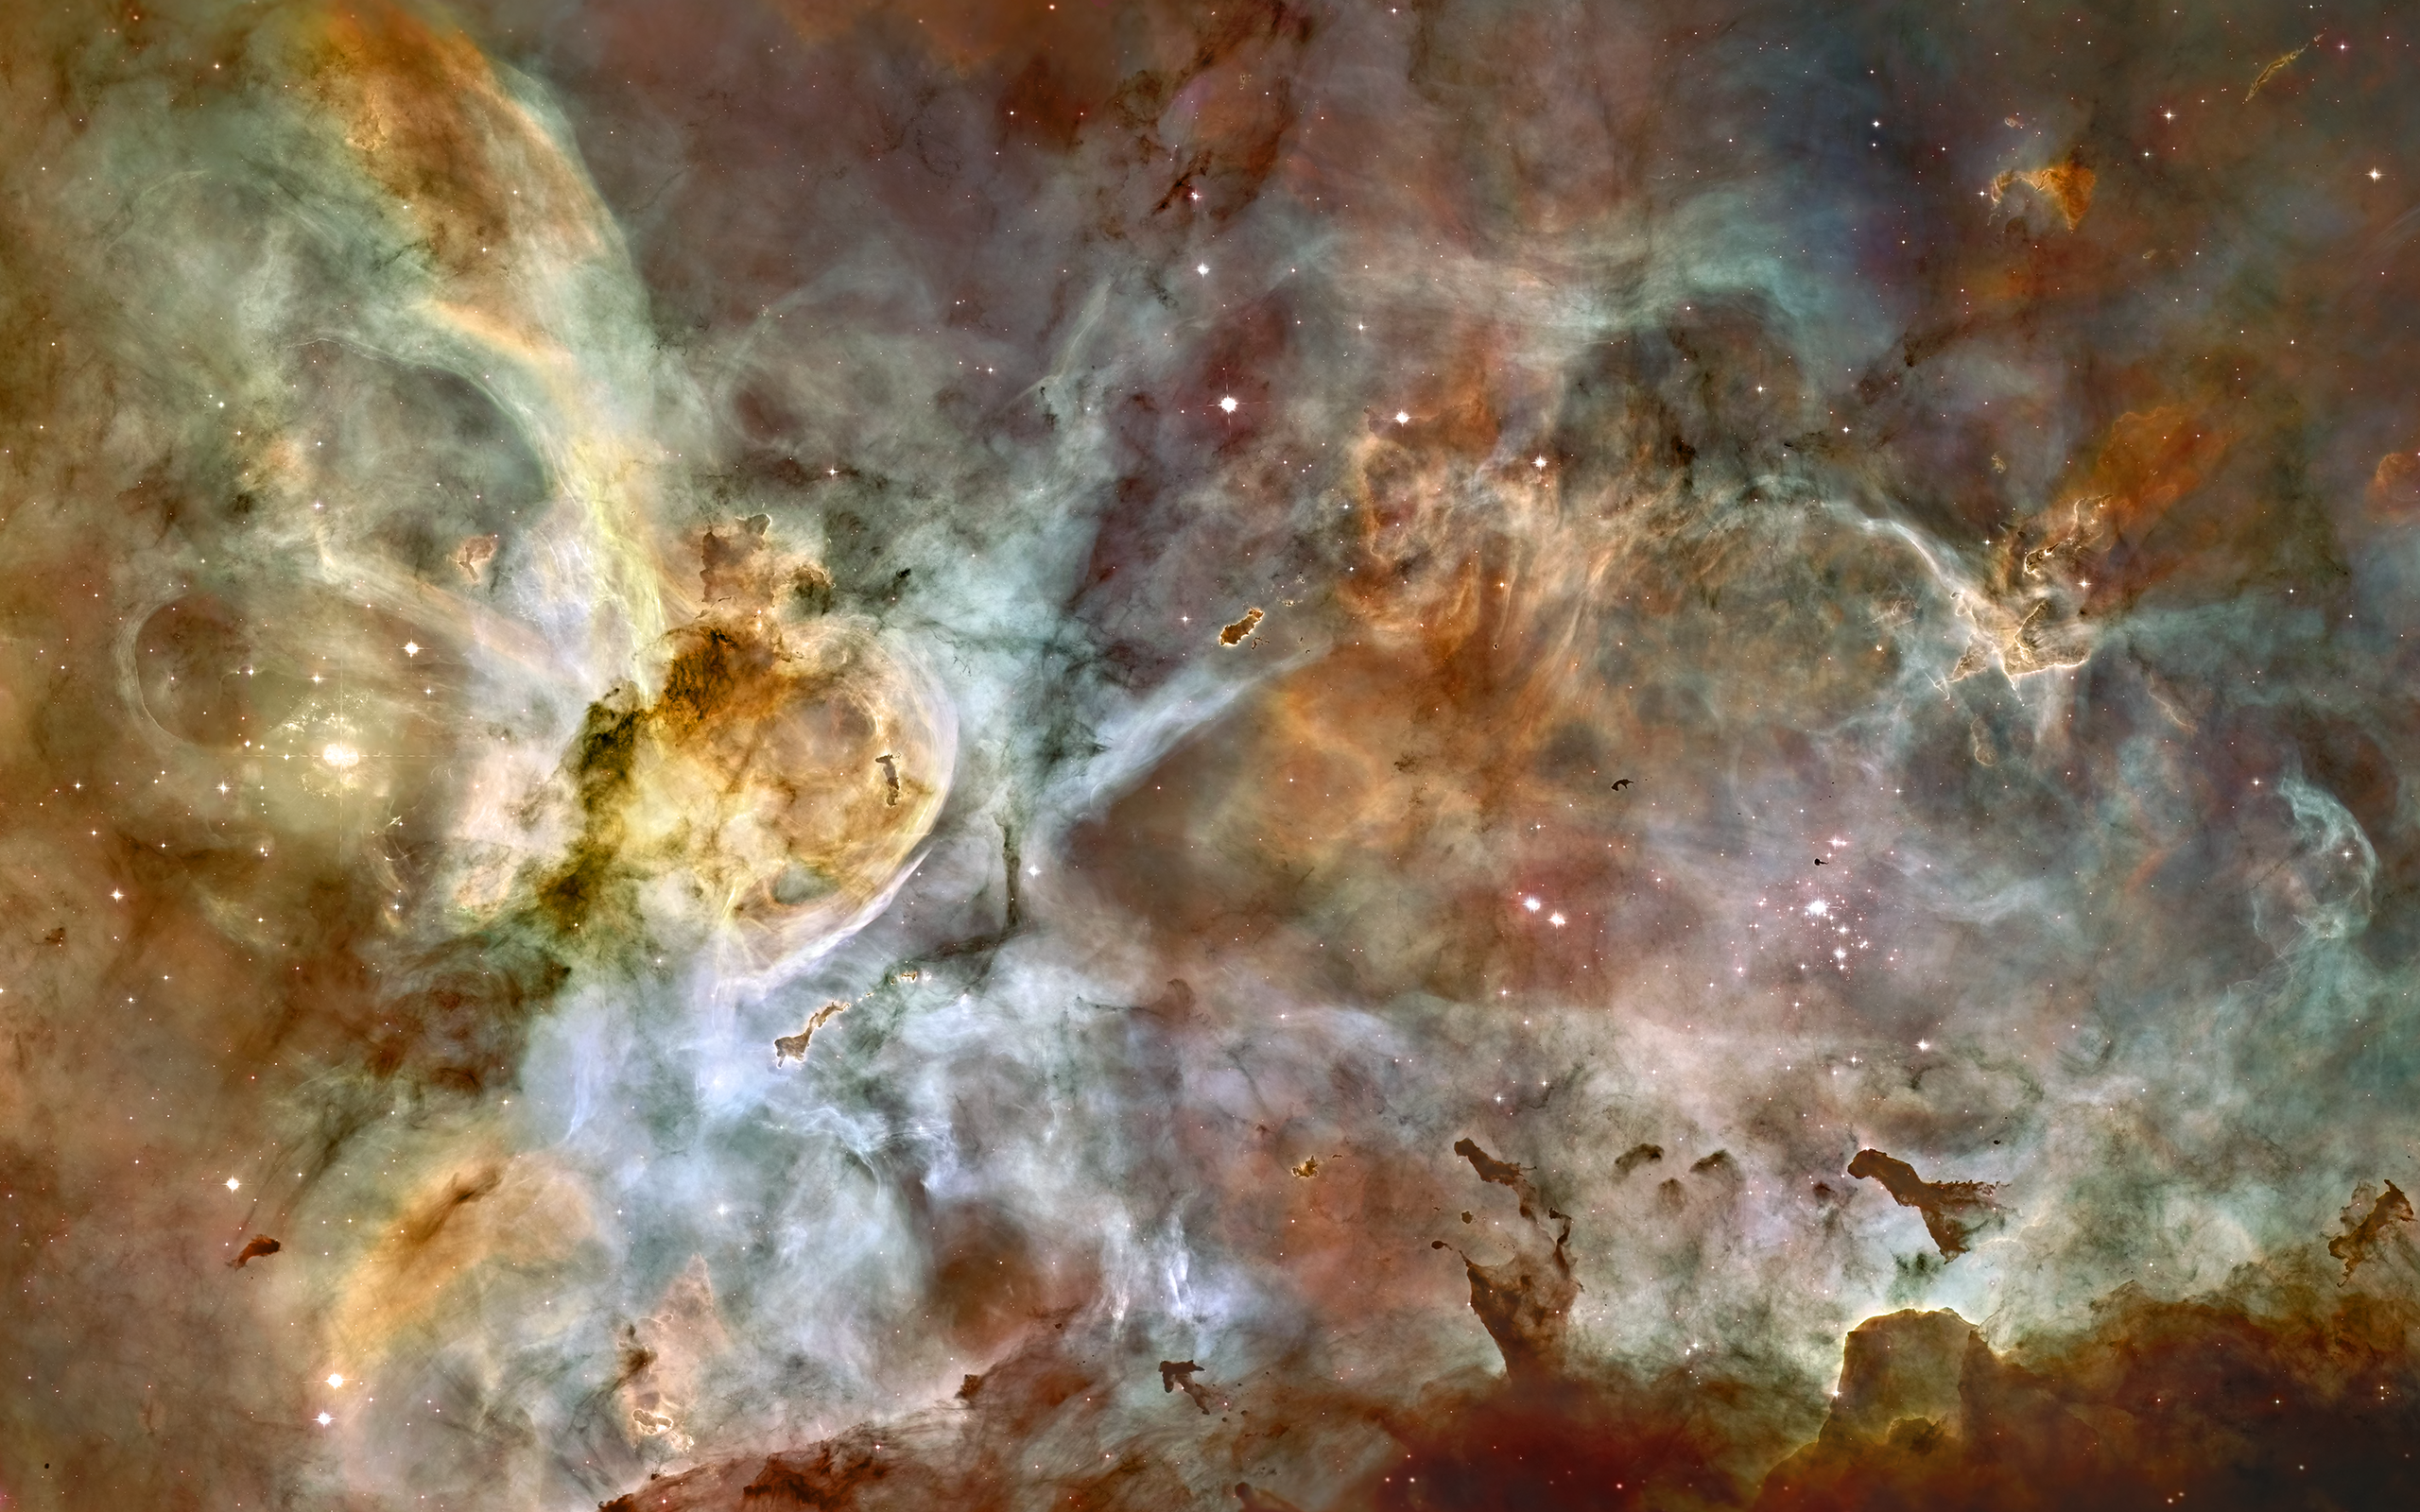
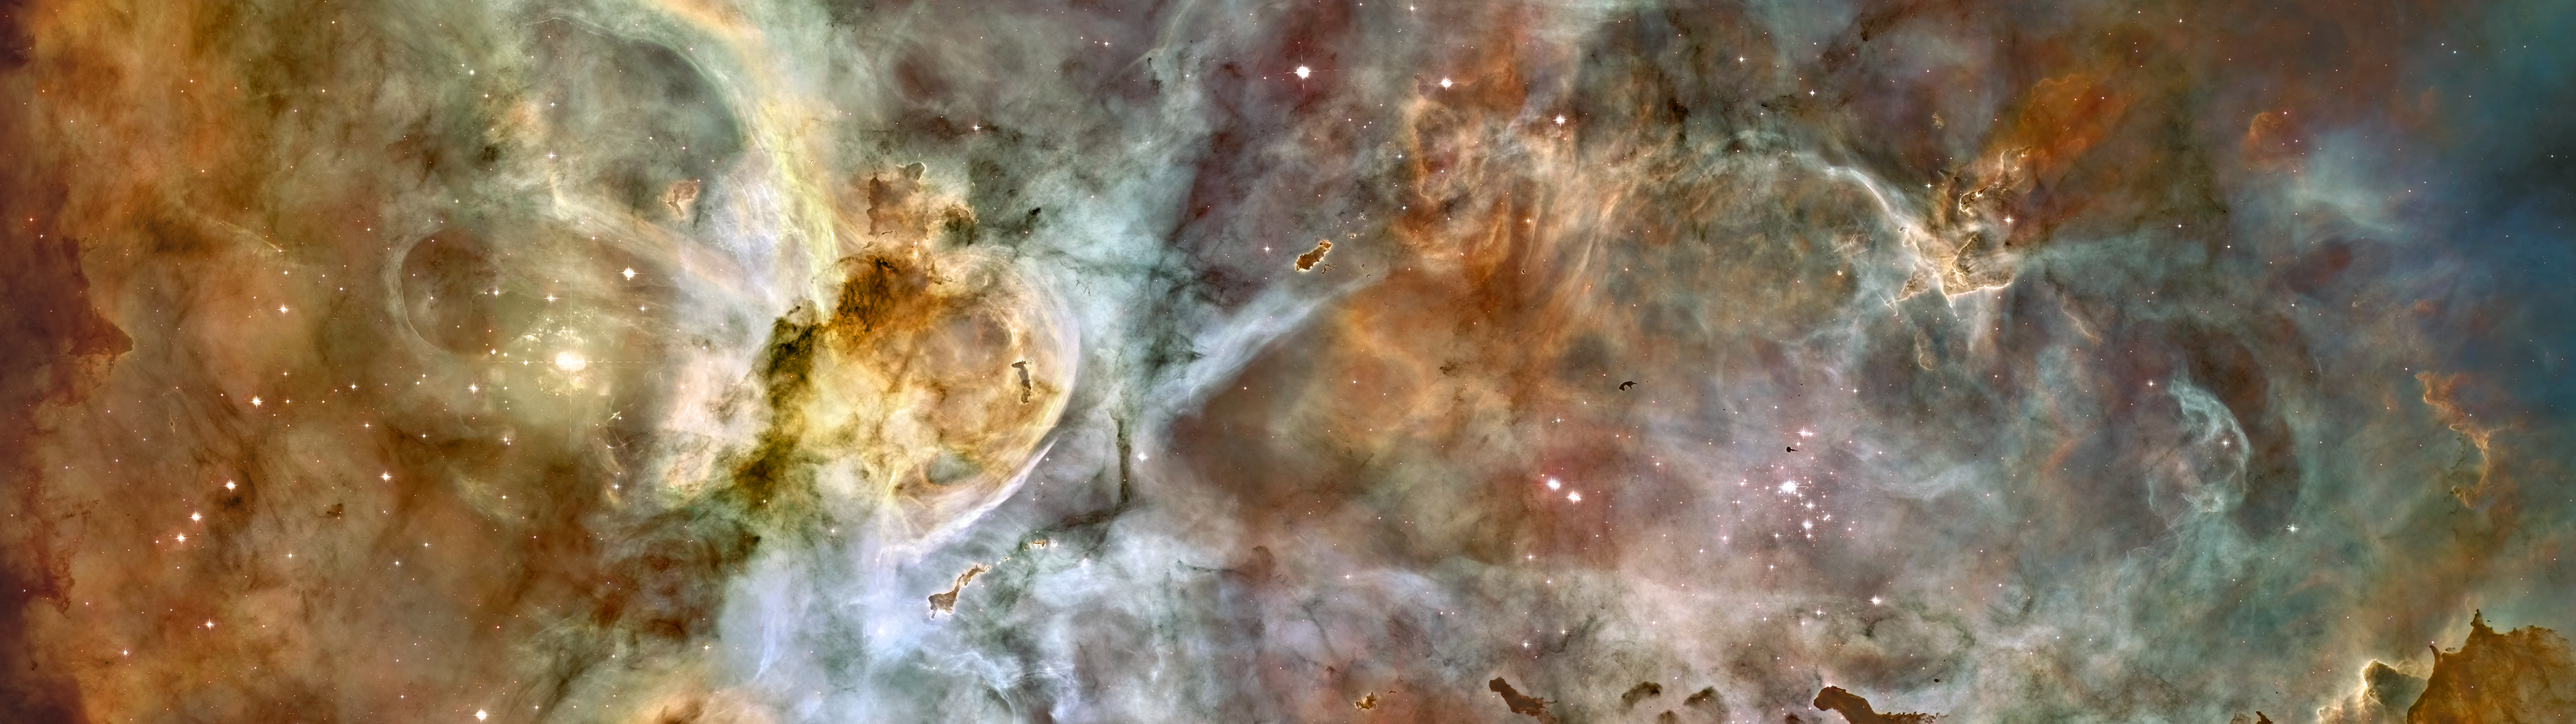
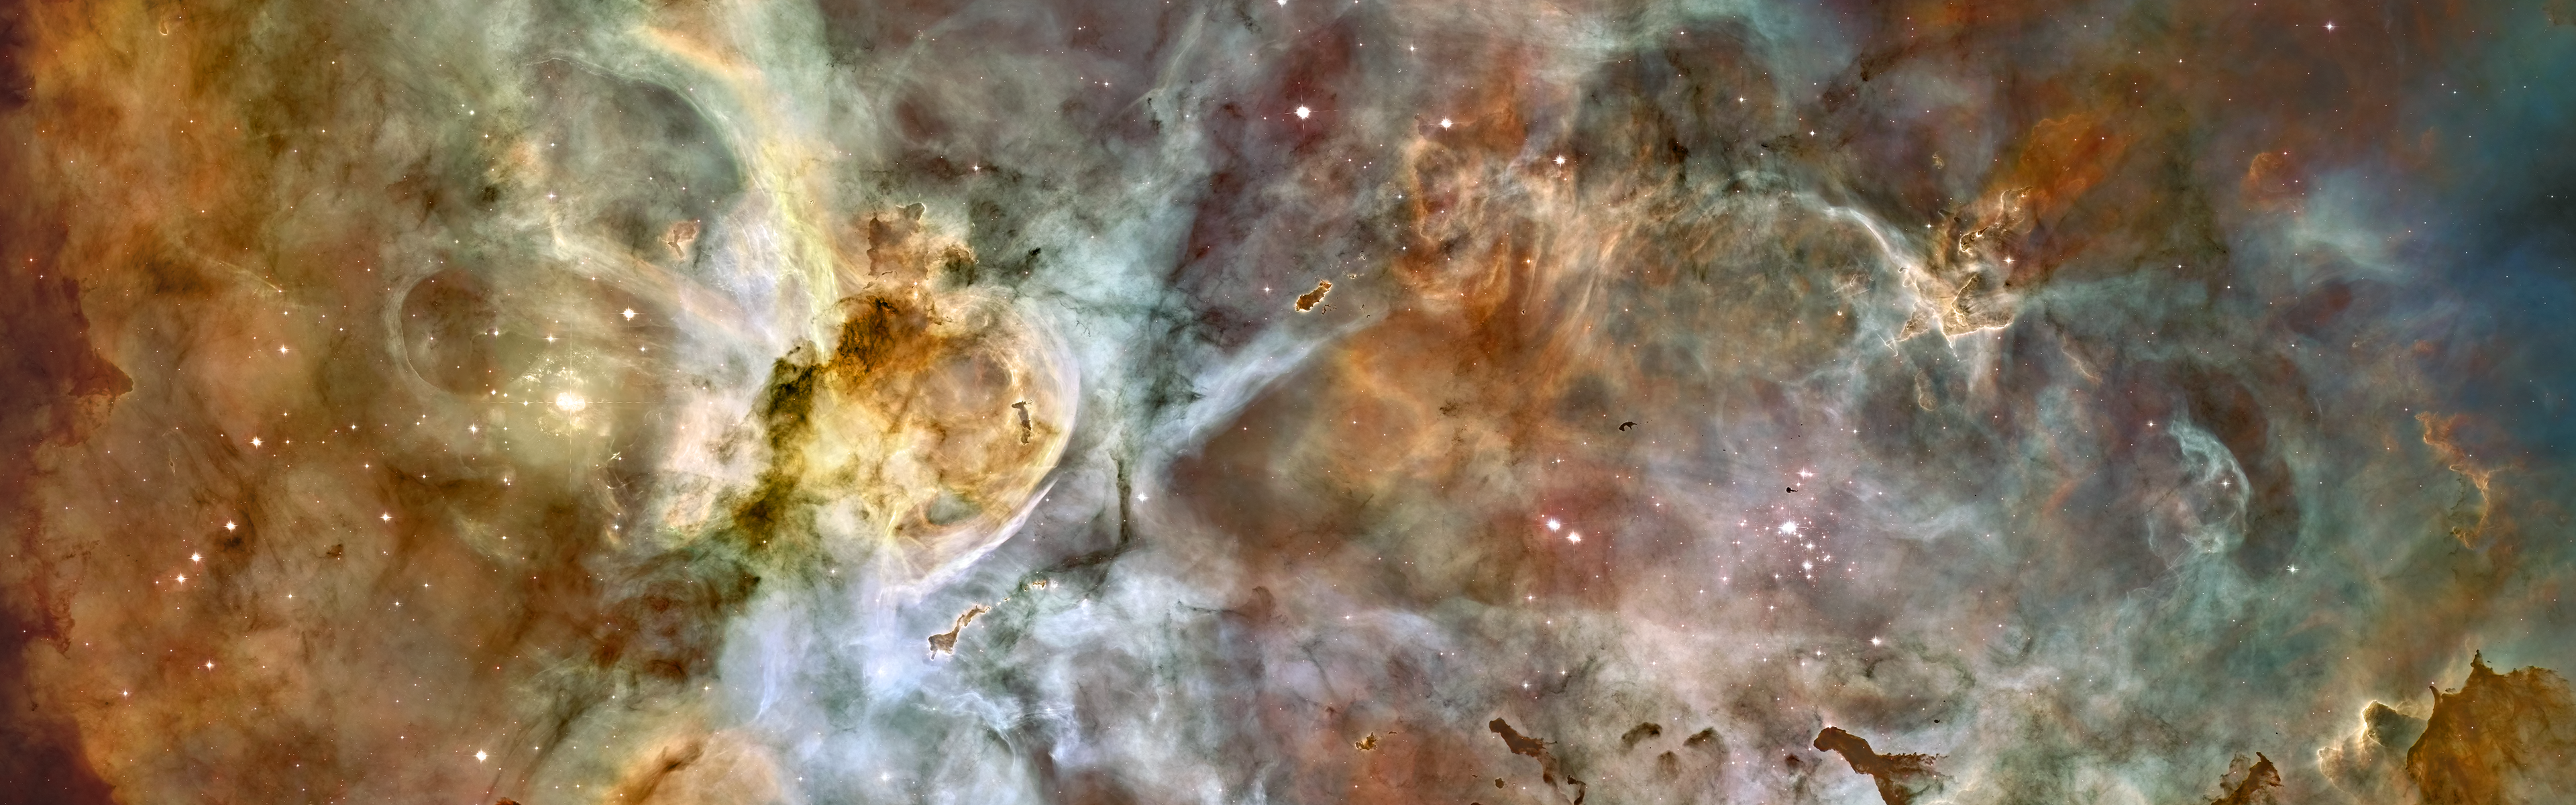
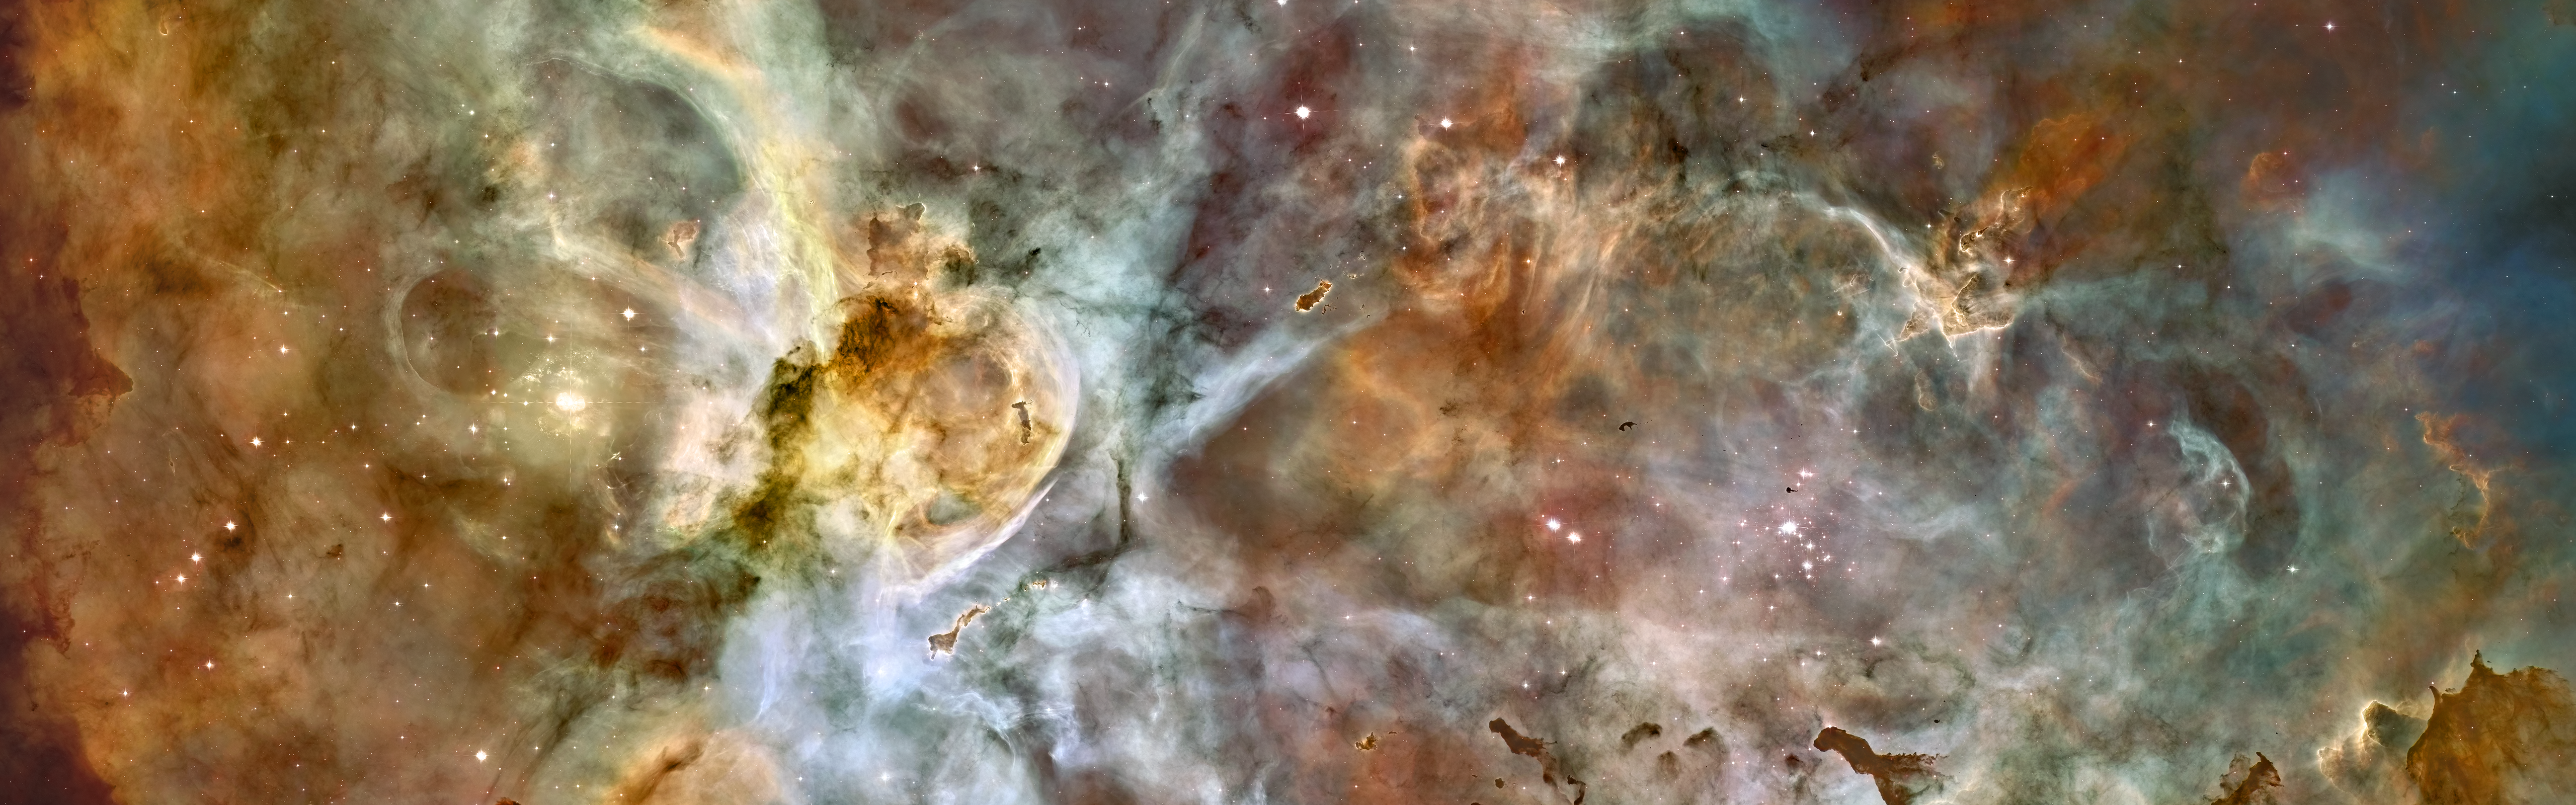
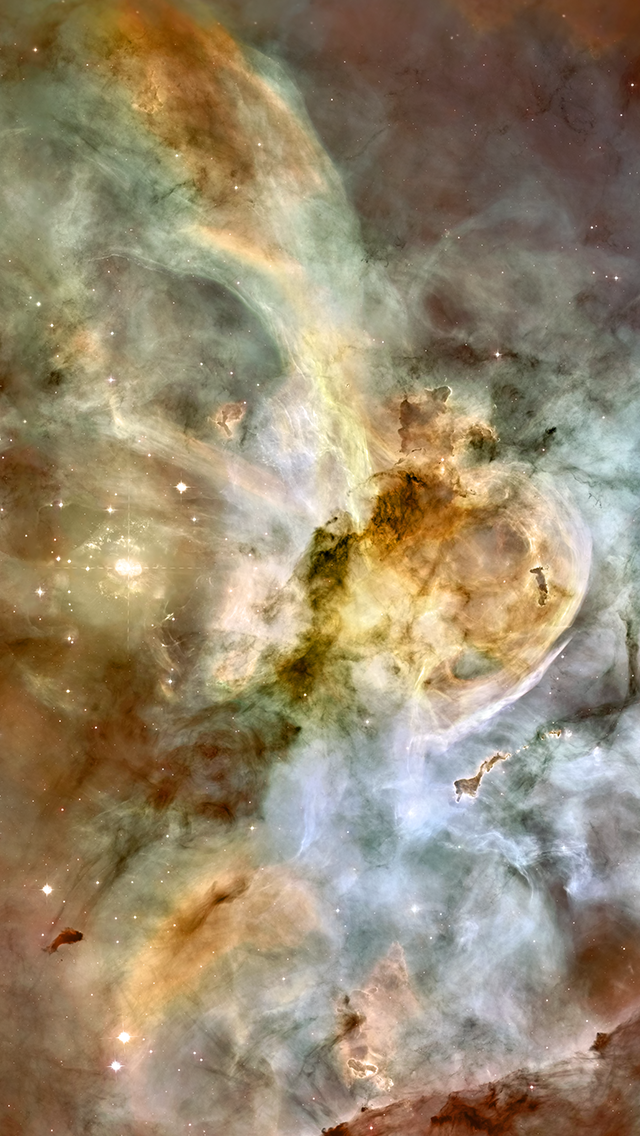
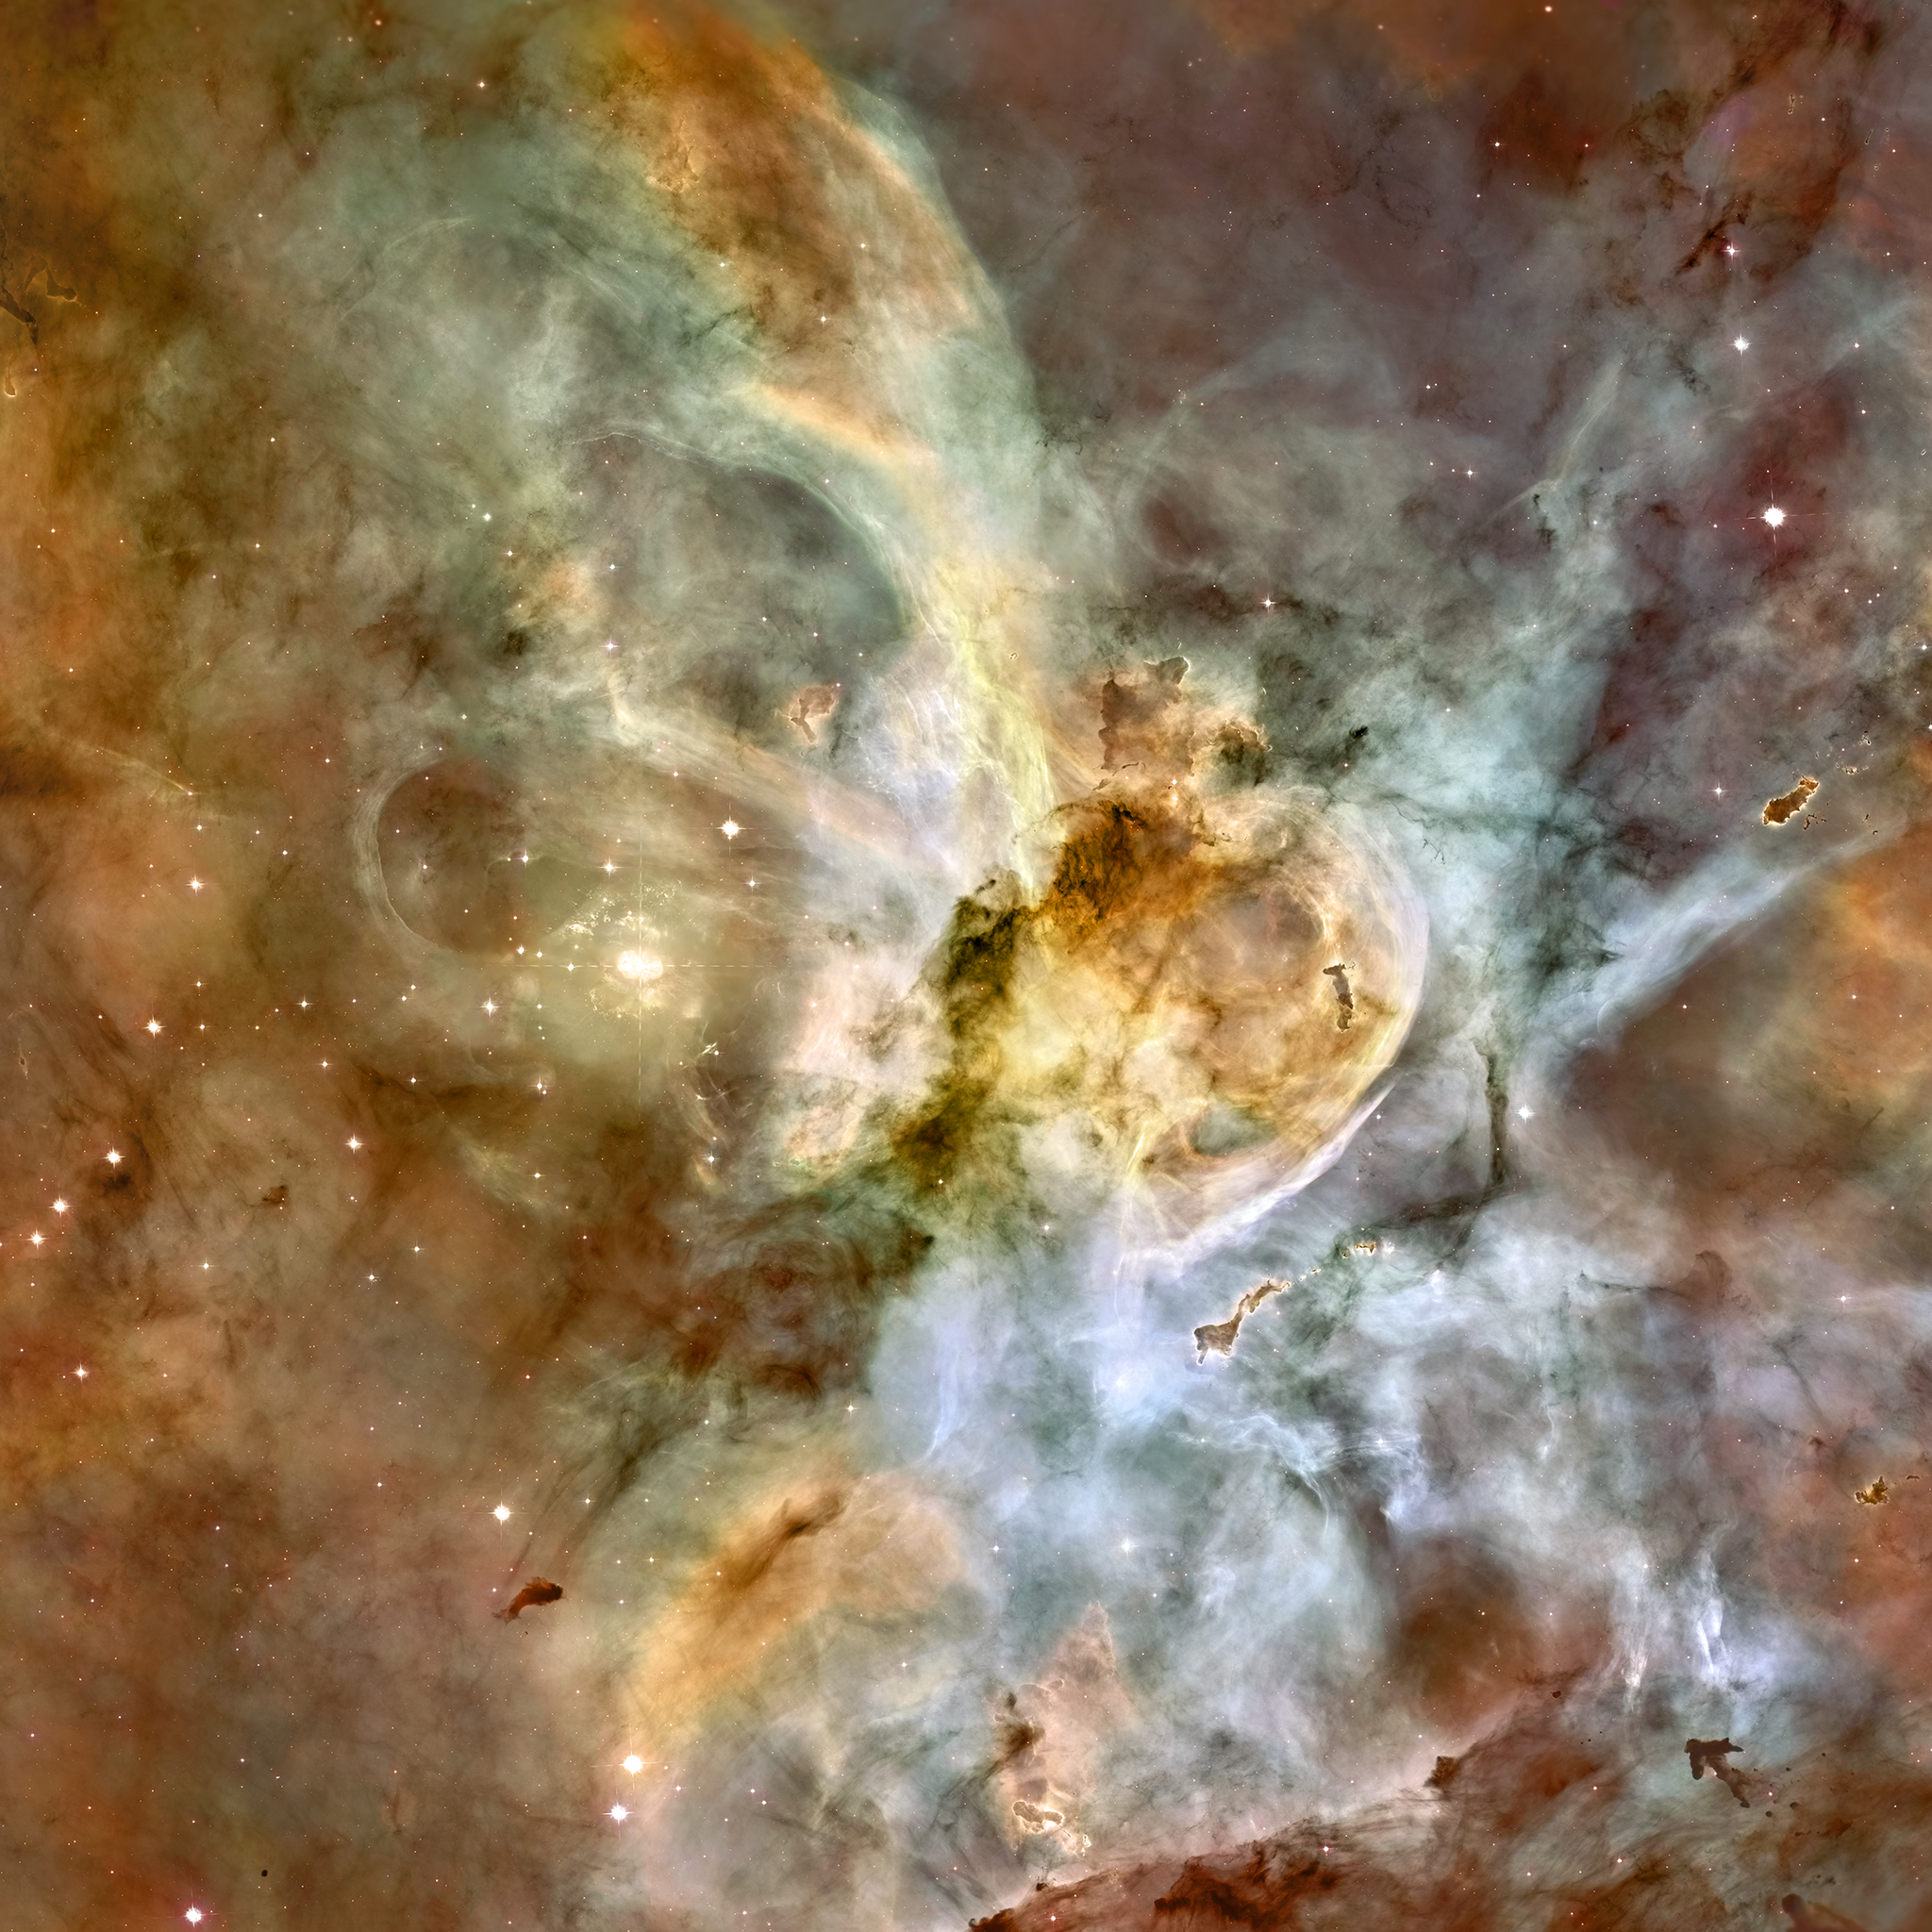
| The Carina Nebula |
I took Hubble's view of the Carina Nebula and used Photoshop CS6 with Auto Contrast to create wallpapers for common resolutions.
Single monitor:
carina_1440x900.png (1.8 MB)
carina_1680x1050.png (2.3 MB)
carina_1920x1080.png (2.7 MB)
carina_1920x1200.png (3.0 MB)
carina_2560x1440.png (4.5 MB)
carina_2560x1600.png (5.0 MB)
Dual monitor:
carina_2880x900.png (3.3 MB)
carina_3360x1050.png (4.3 MB)
carina_3840x1080.png (5.0 MB)
carina_3840x1200.png (5.5 MB)
carina_5120x1440.png (8.4 MB)
carina_5120x1600.png (9.4 MB)
carina_640x1136.png (1.0 MB) : iPhone Retina display.
carina_2048x2048.png (4.9 MB) : iPad Retina display.
carina_2880x1800.png (6.2 MB) : MacBook Pro Retina display.
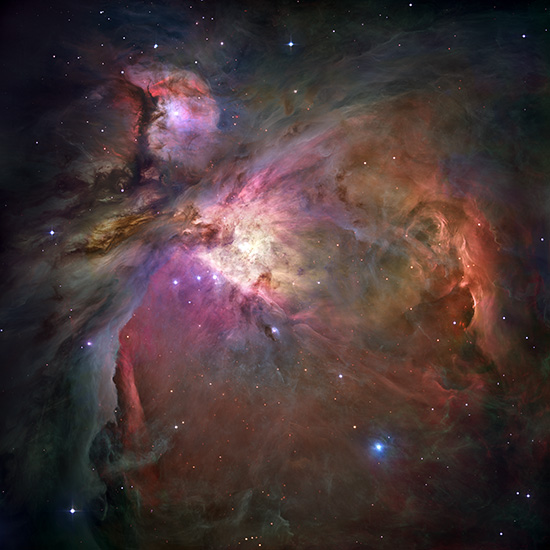 |
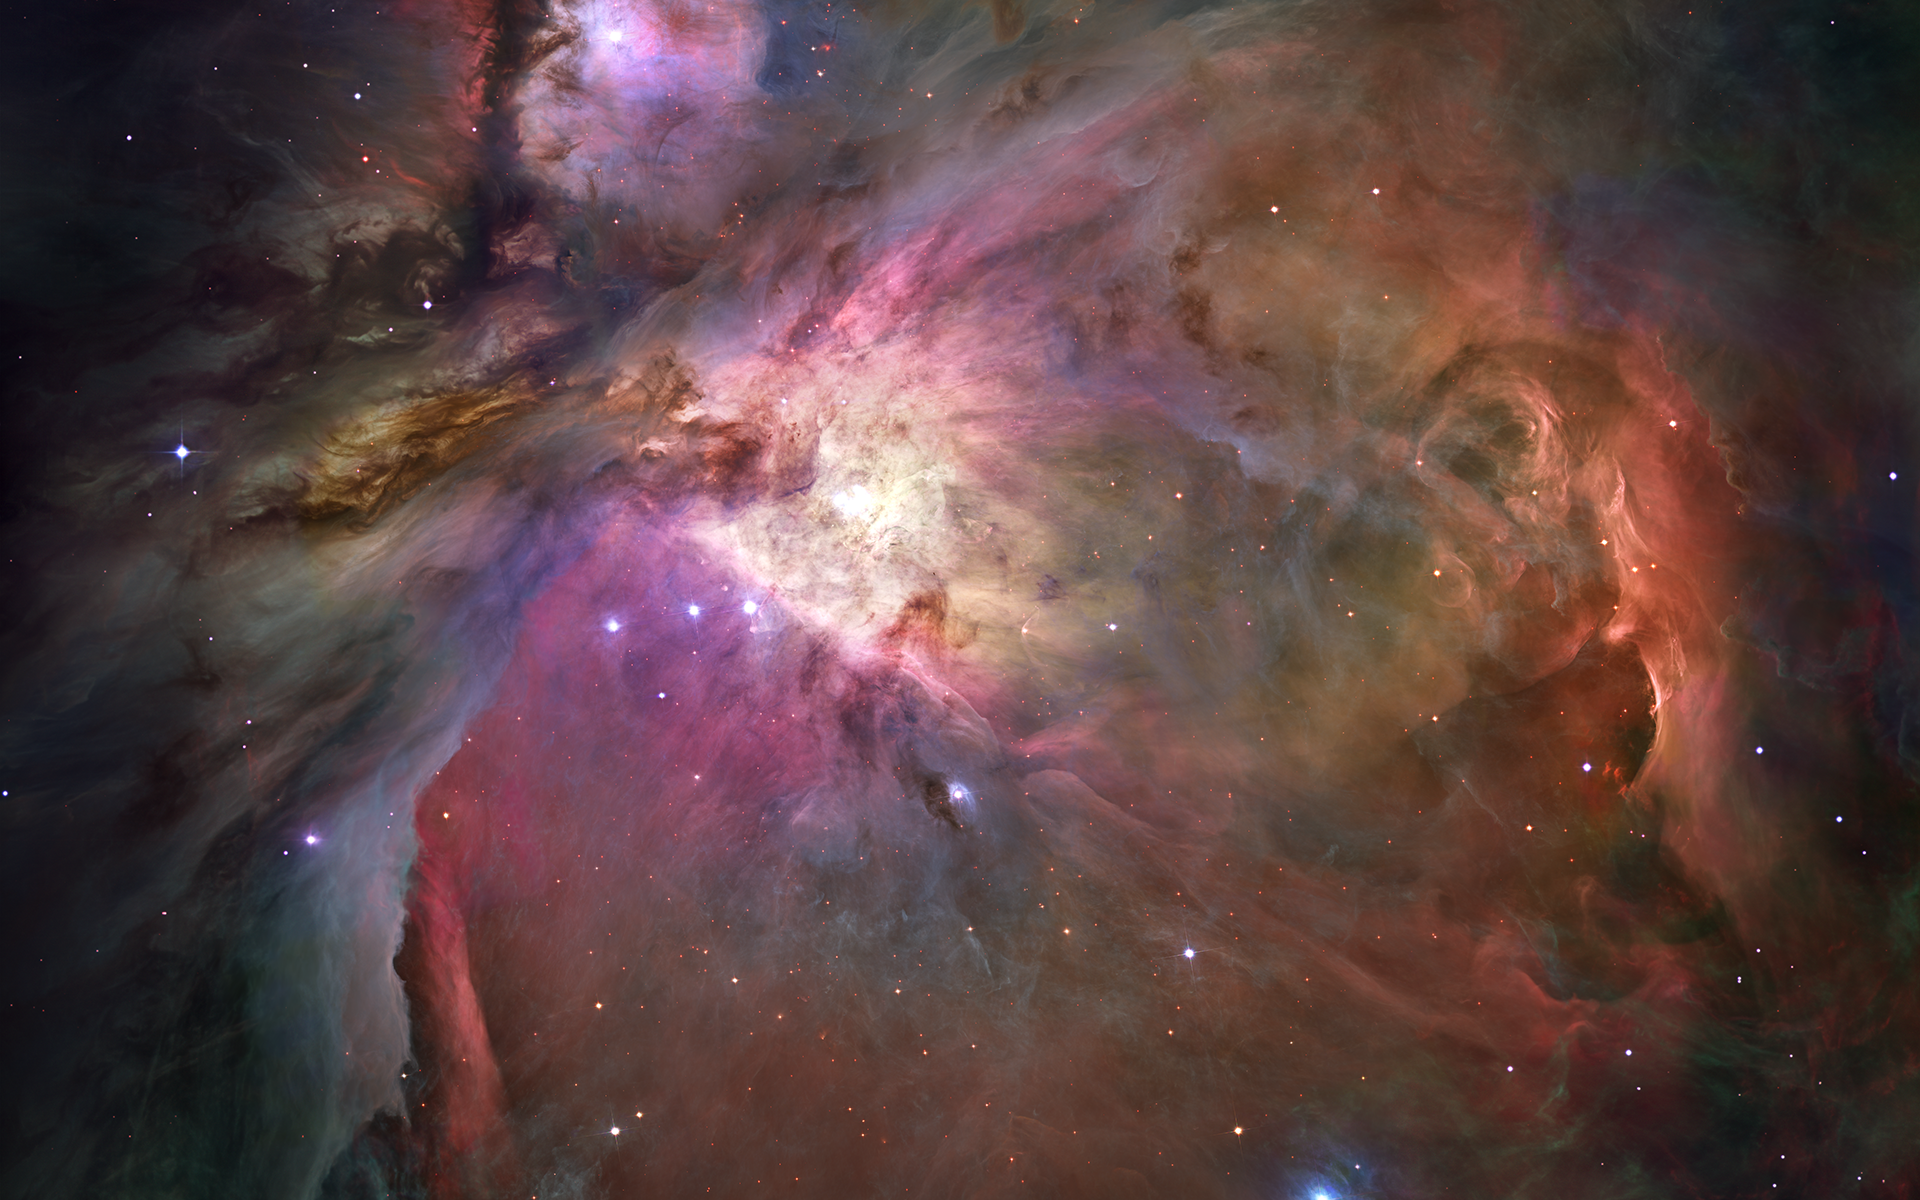
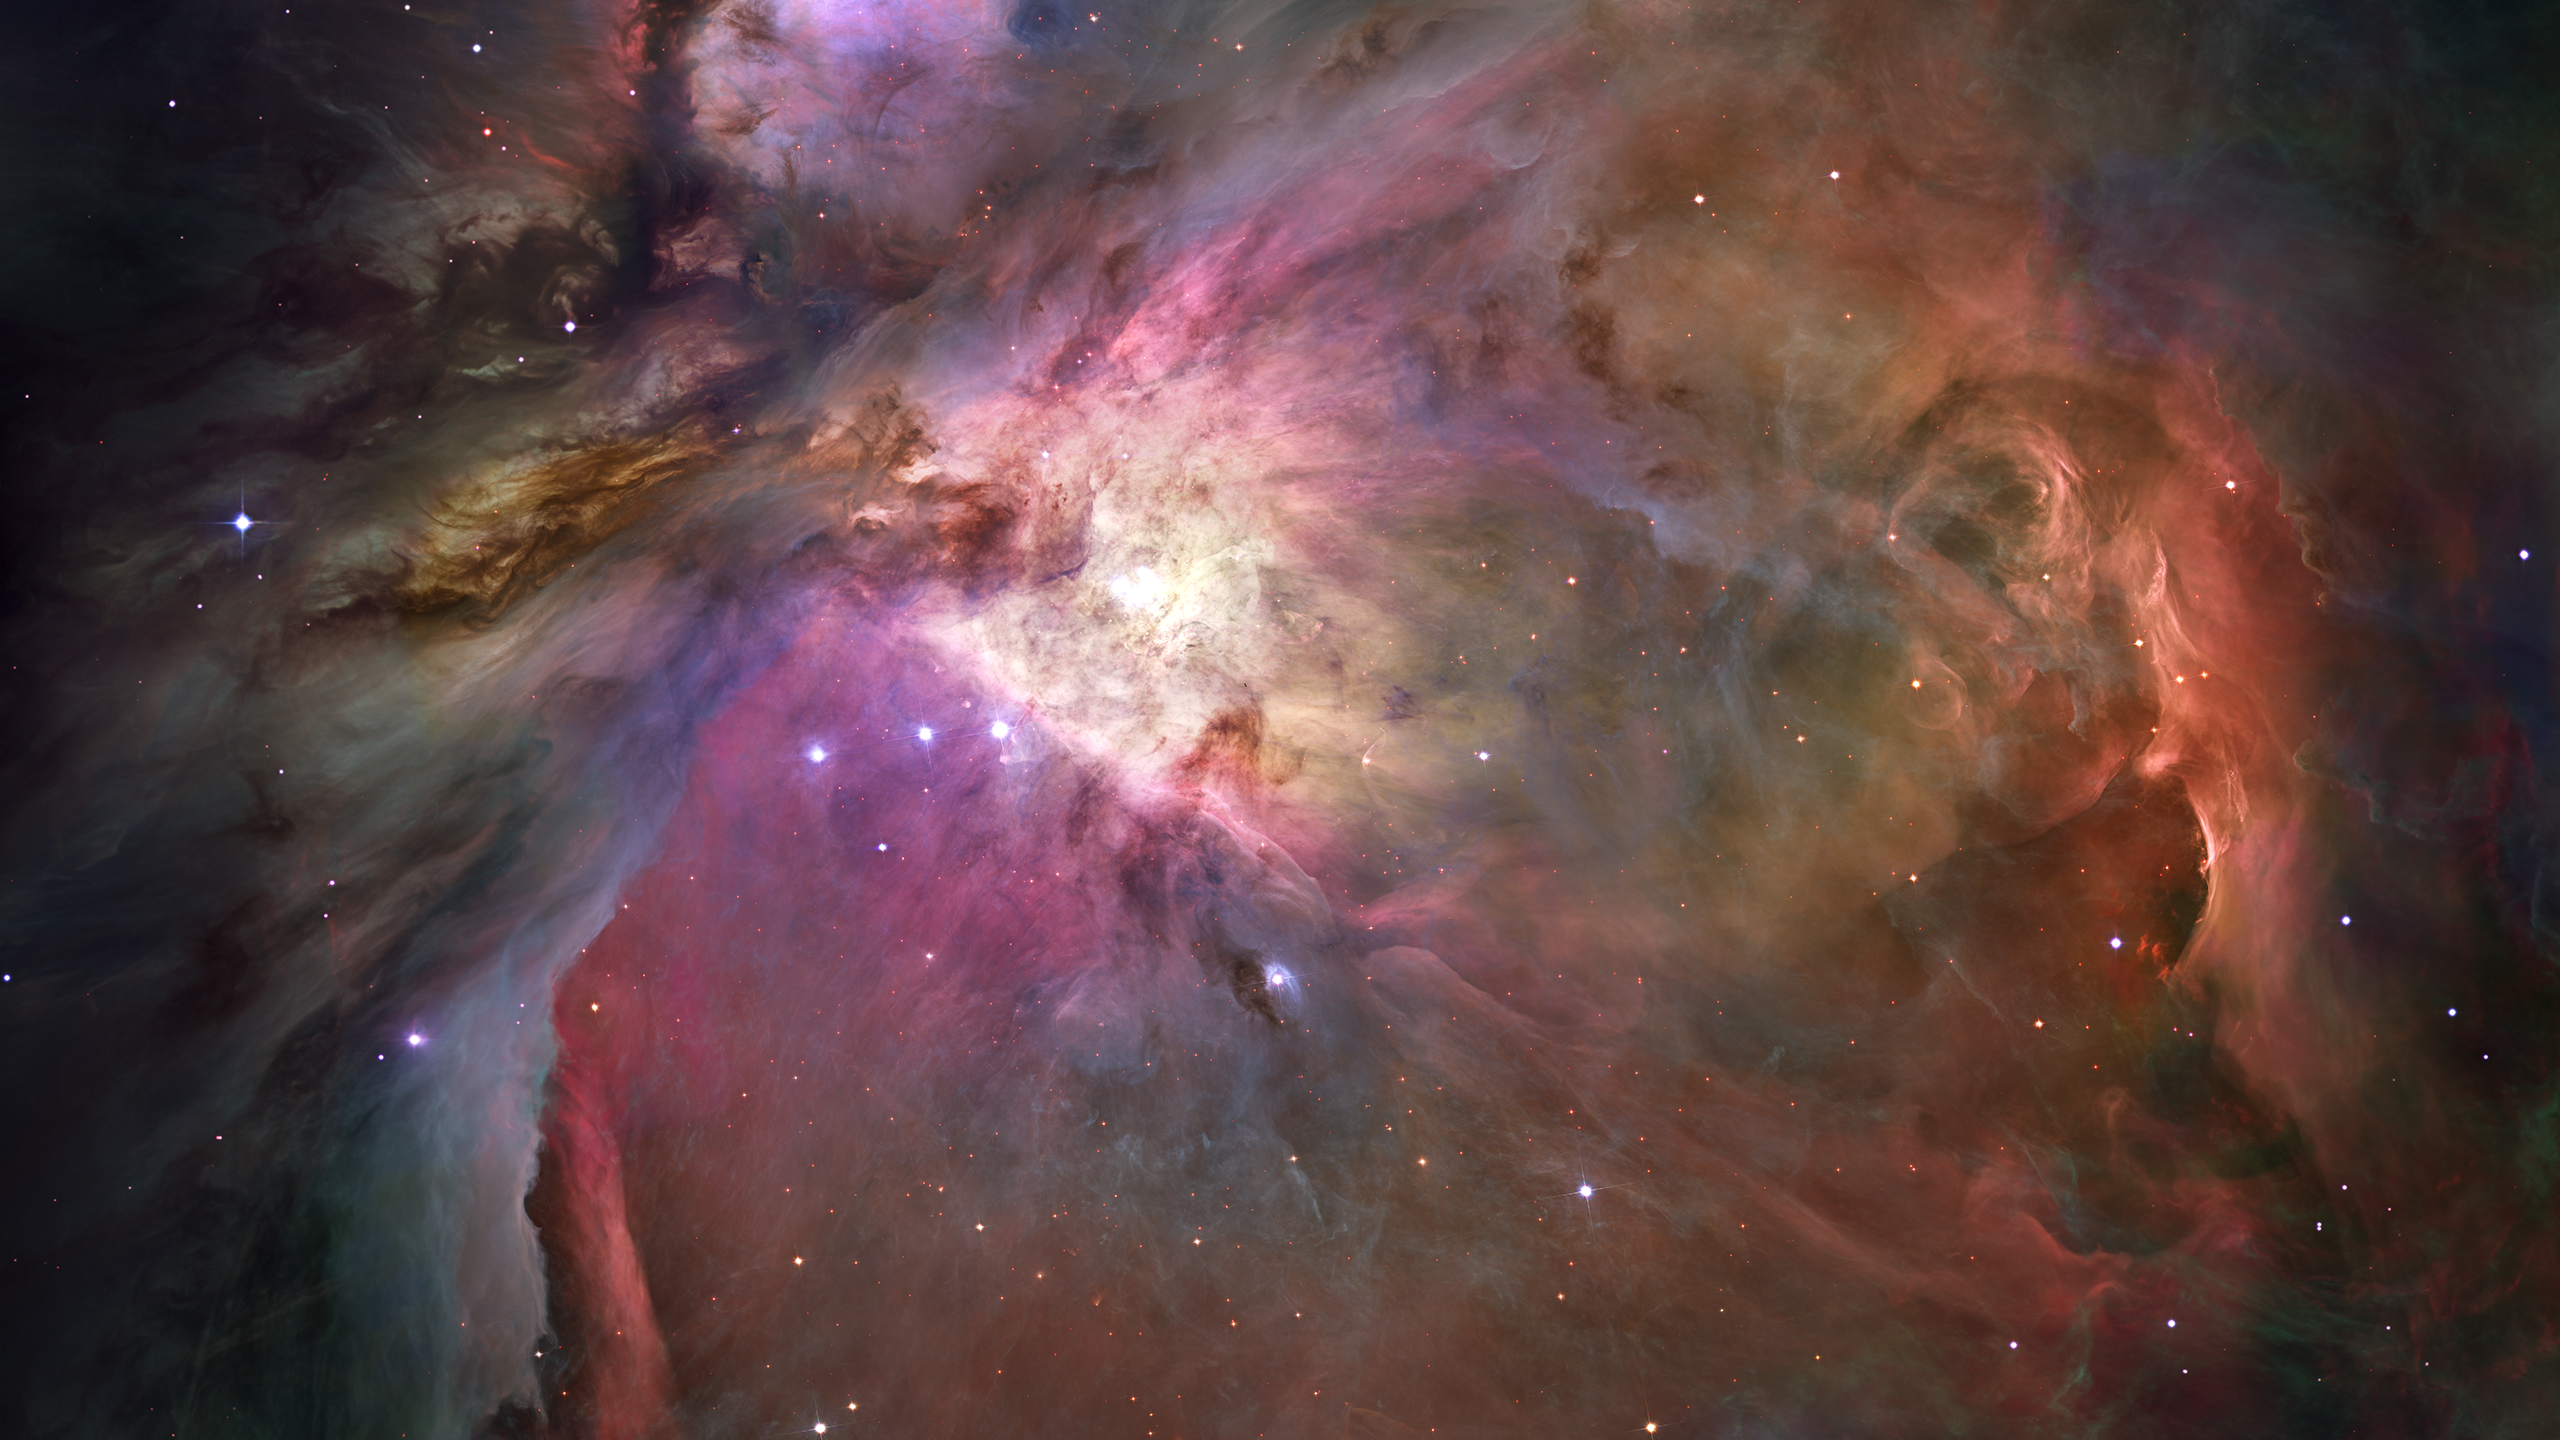
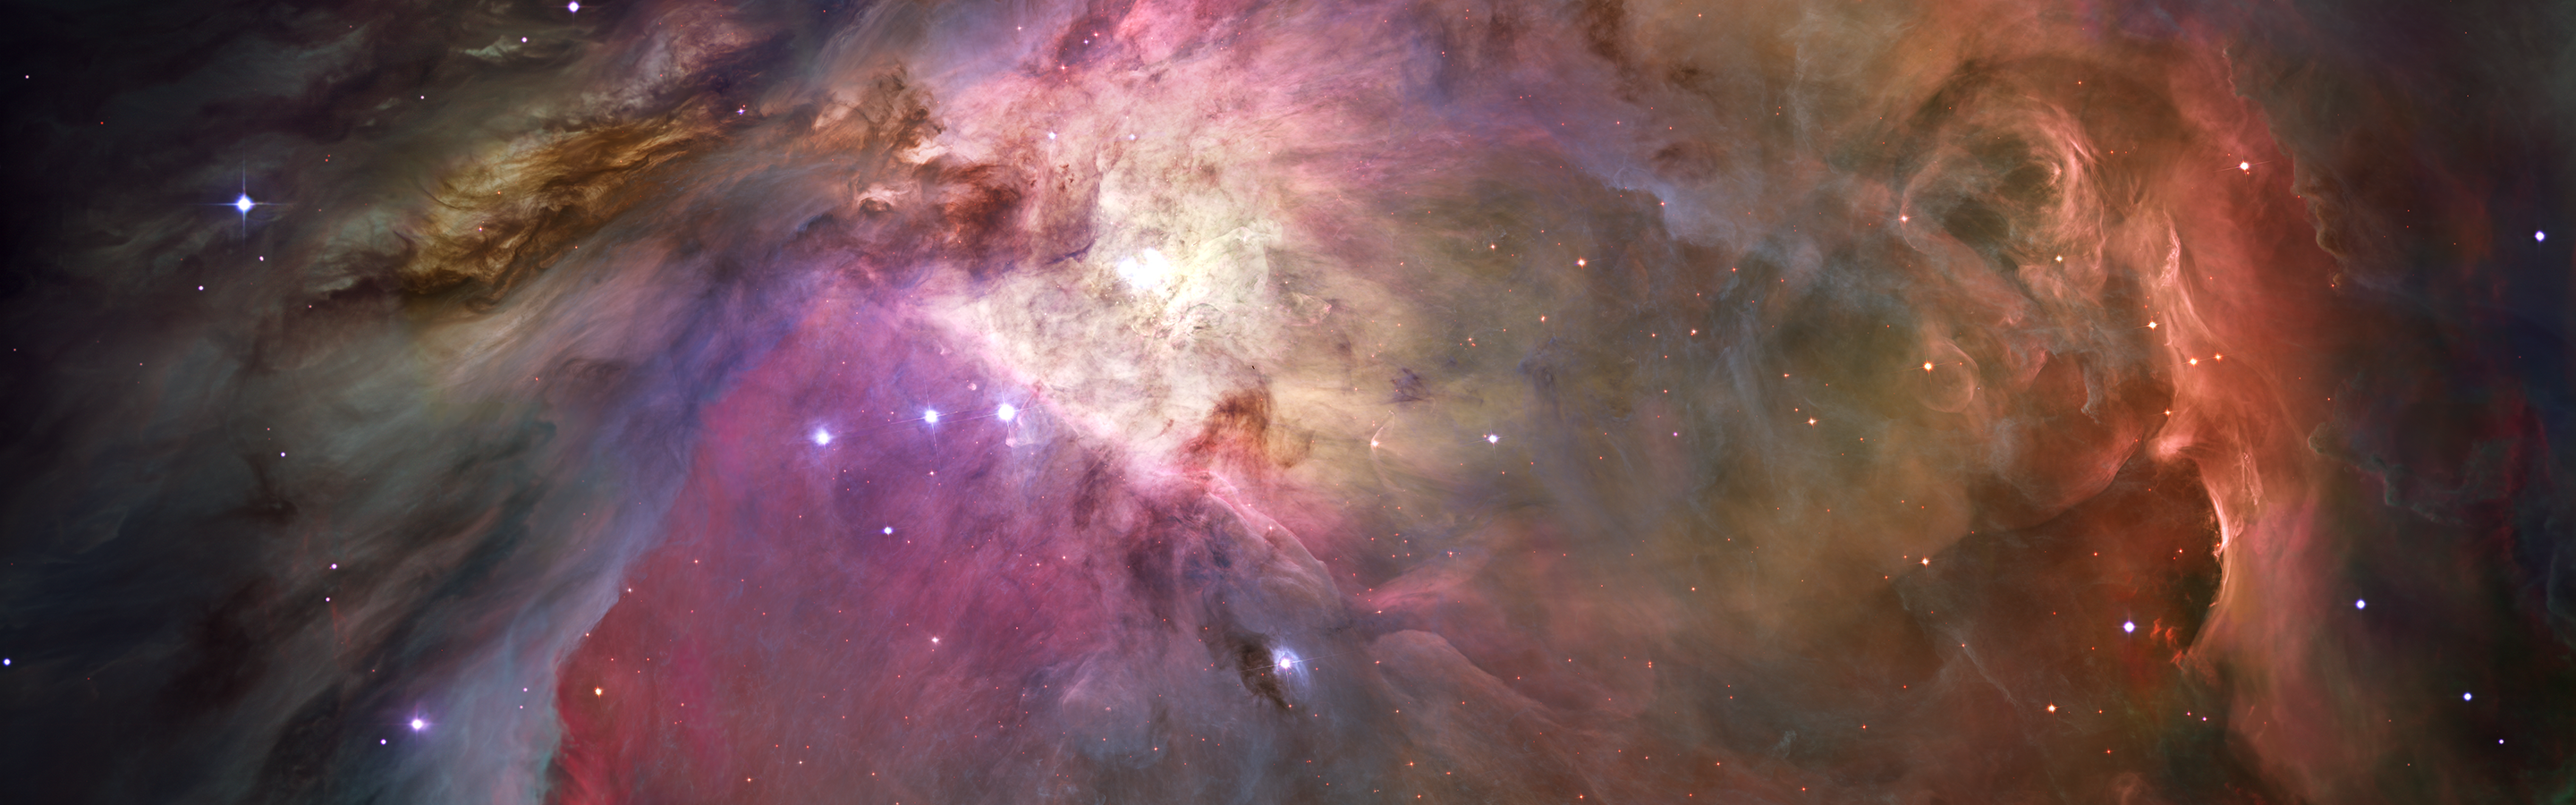
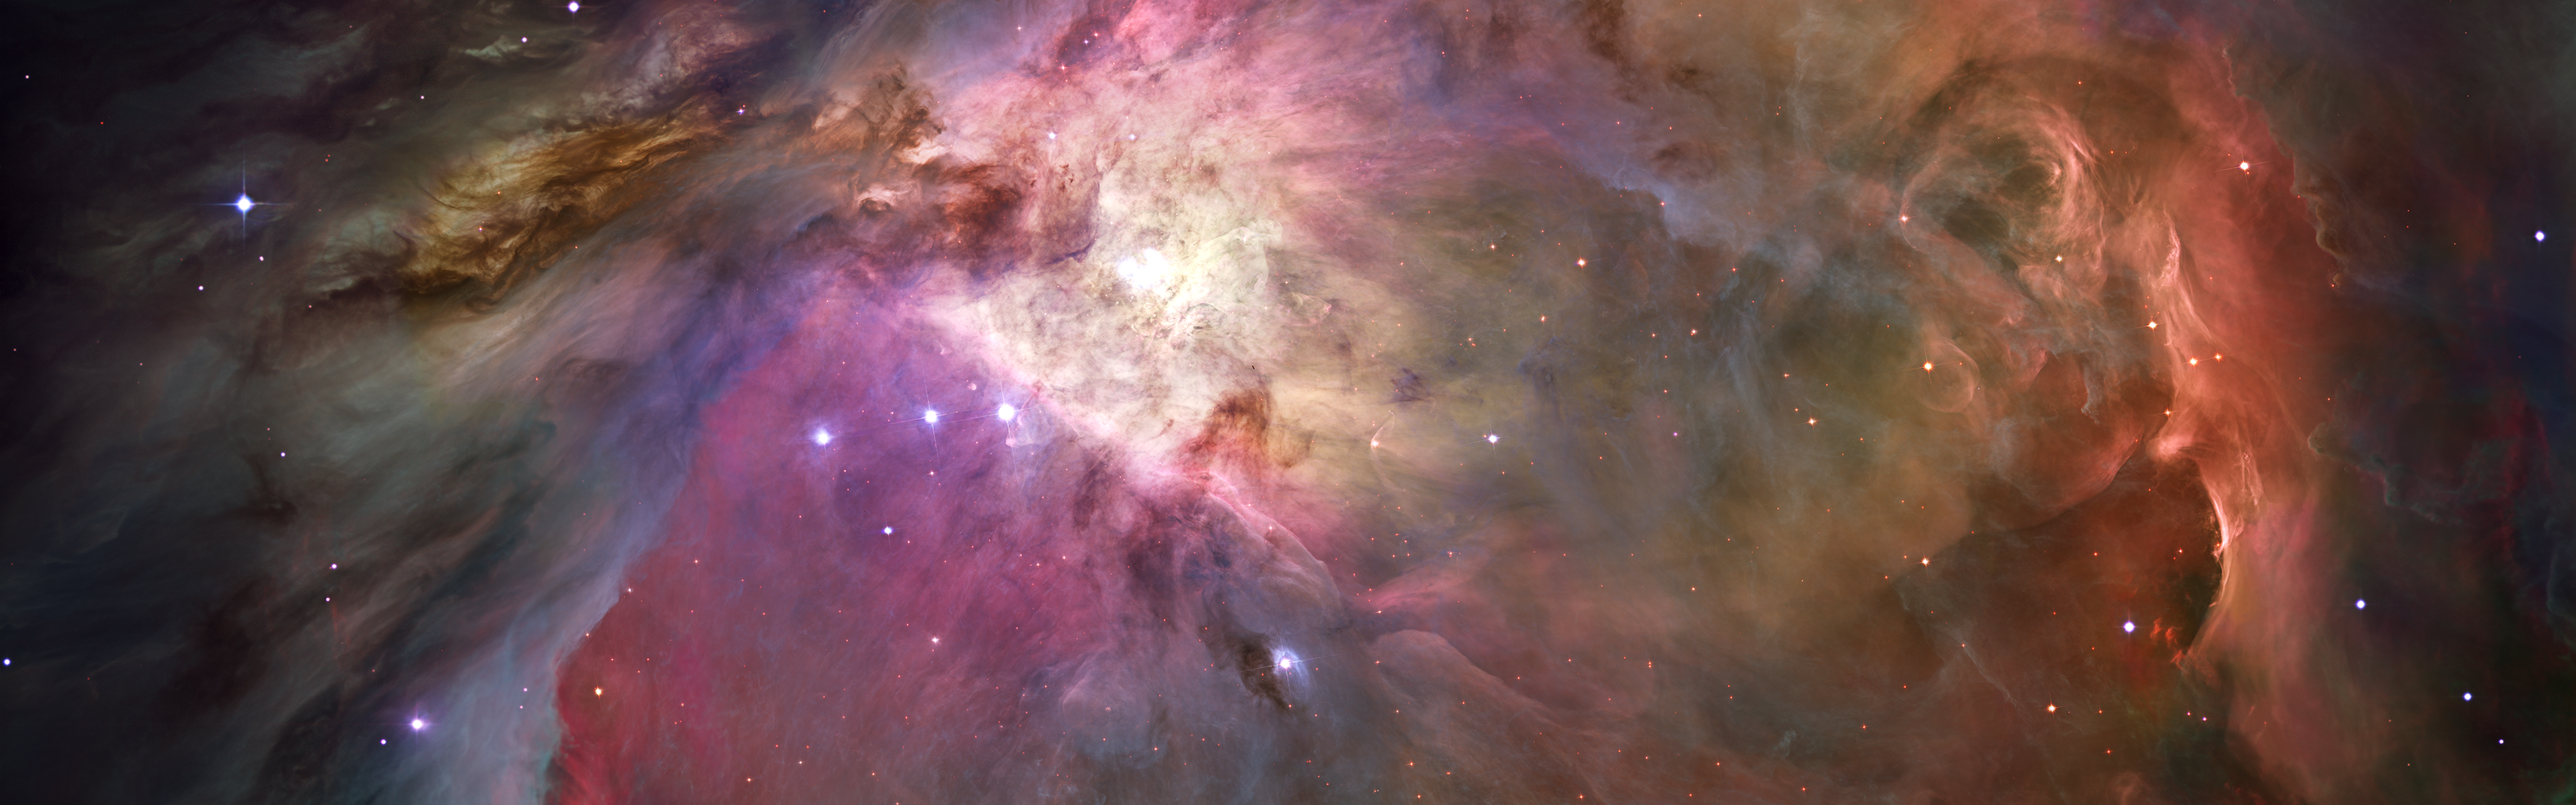
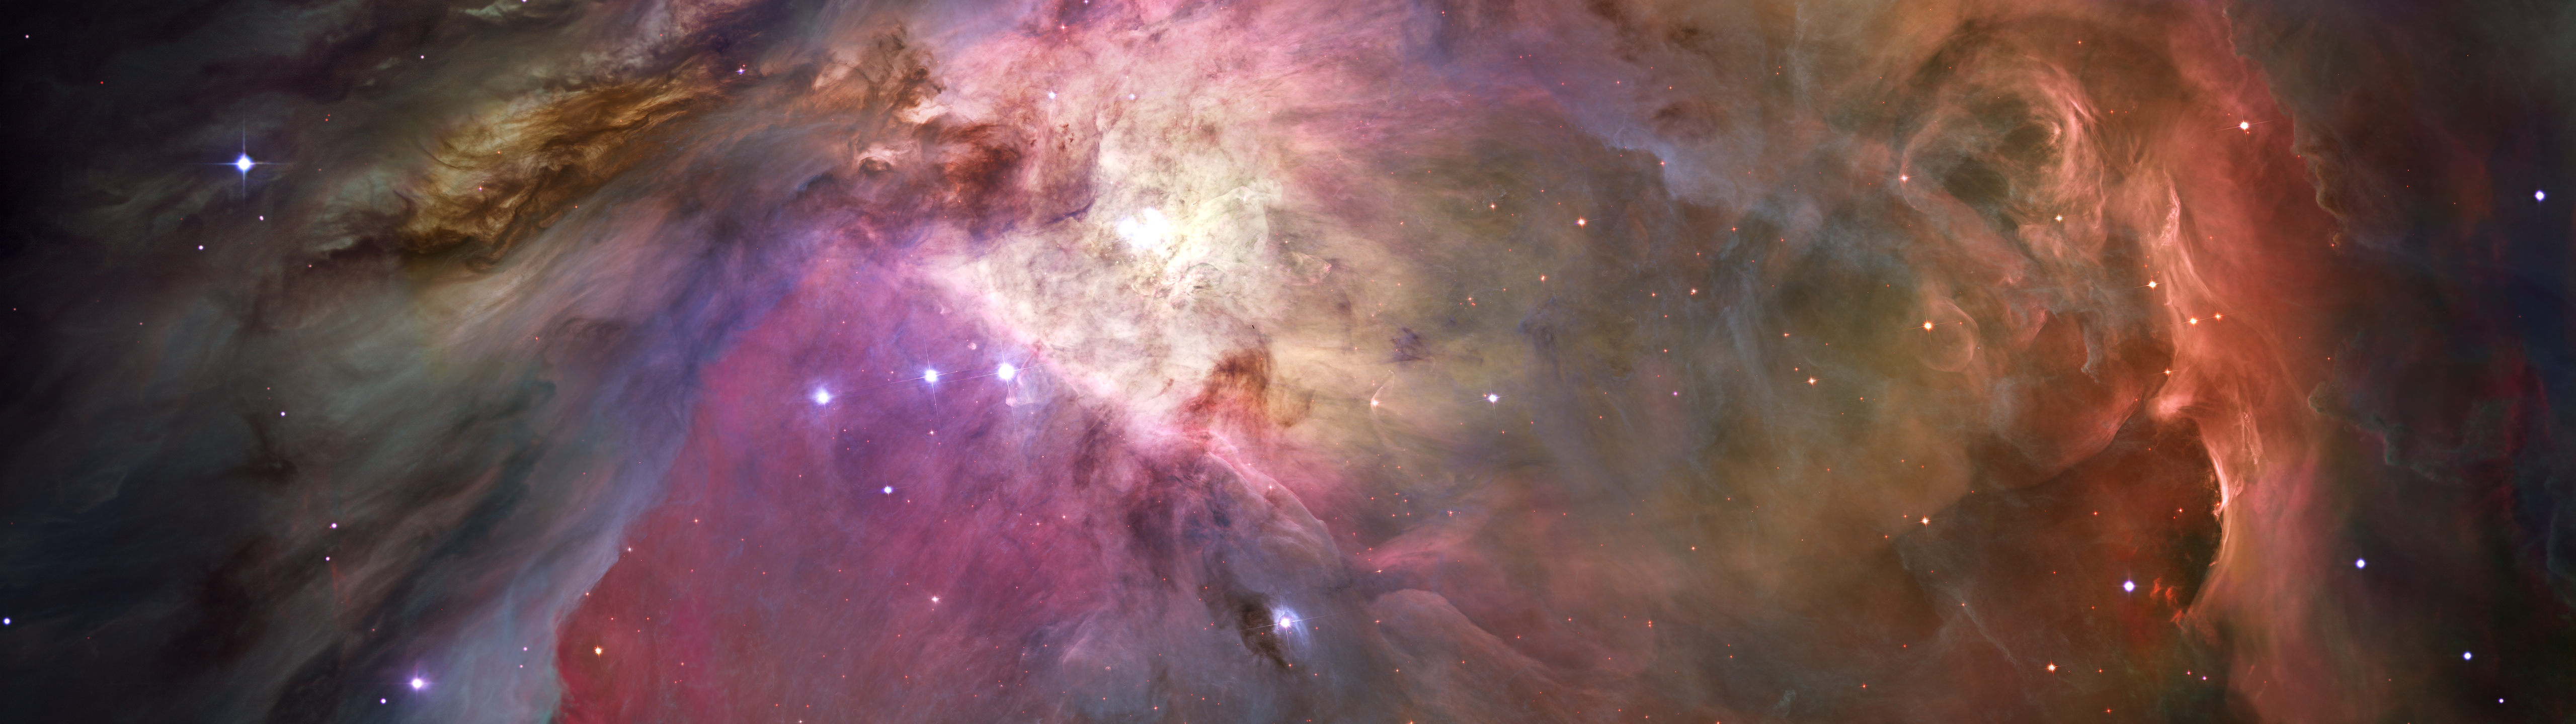
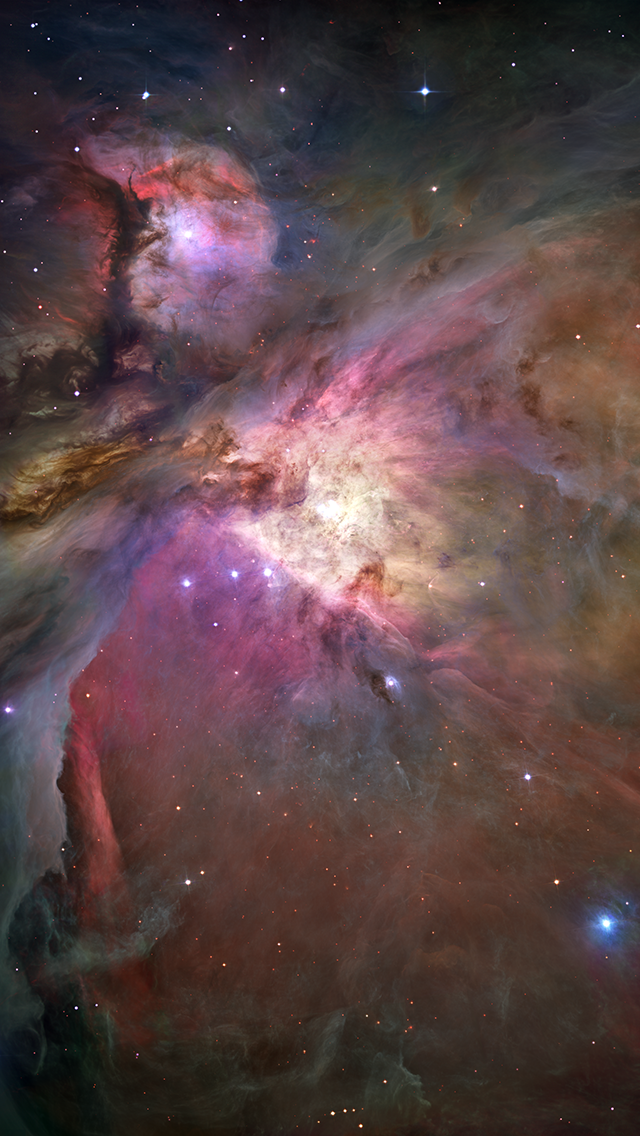
| The Orion Nebula |
I did the same thing for Hubble's Sharpest View Of The Orion Nebula.
Single monitor:
orion_1440x900.png (1.5 MB)
orion_1680x1050.png (2.0 MB)
orion_1920x1080.png (2.4 MB)
orion_1920x1200.png (2.6 MB)
orion_2560x1440.png (4.0 MB)
orion_2560x1600.png (4.4 MB)
Dual monitor:
orion_2880x900.png (2.9 MB)
orion_3360x1050.png (4.0 MB)
orion_3840x1080.png (4.6 MB)
orion_3840x1200.png (5.1 MB)
orion_5120x1440.png (8.1 MB)
orion_5120x1600.png (8.9 MB)
orion_640x1136.png (939 KB) : iPhone Retina display.
orion_2048x2048.png (4.4 MB) : iPad Retina display.
orion_2880x1800.png (5.6 MB) : MacBook Pro Retina display.
 |
| The Stars In Their Sockets, Their Secrets Unfurled |
stars.psd.bz2 (797 KB) : Full resolution PSD.
I used Photoshop CS to create from scratch the star images for my Rating System. I started with the Polygon Tool, creating a pentagonal star with a 53% indent. I duplicated this layer, naming the top layer Border. I set the Border layer's blending mode to Multiply, locked its transparency, filled it with white, and gave it an Inner Glow of black. I locked the bottom layer's transparency, and then used the Radial Gradient Tool from 120H 100S 100B to 90H 80S 50B. I made the gradient begin at the upper-left indentation and end at the bottom indentation. This produced a nicely lit bright green star with a dark green border. I named the bottom layer with the gradient colors I used so that I wouldn't forget what they were. I then duplicated the bottom layer and chose other gradient colors to produce more stars.
 |
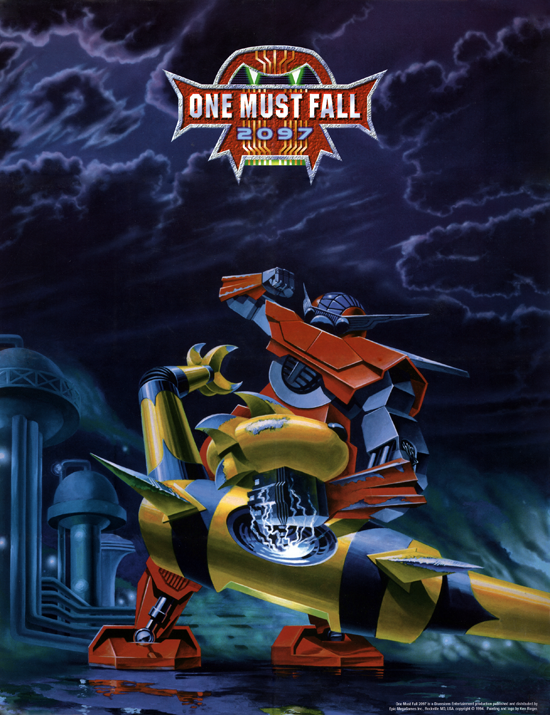 |
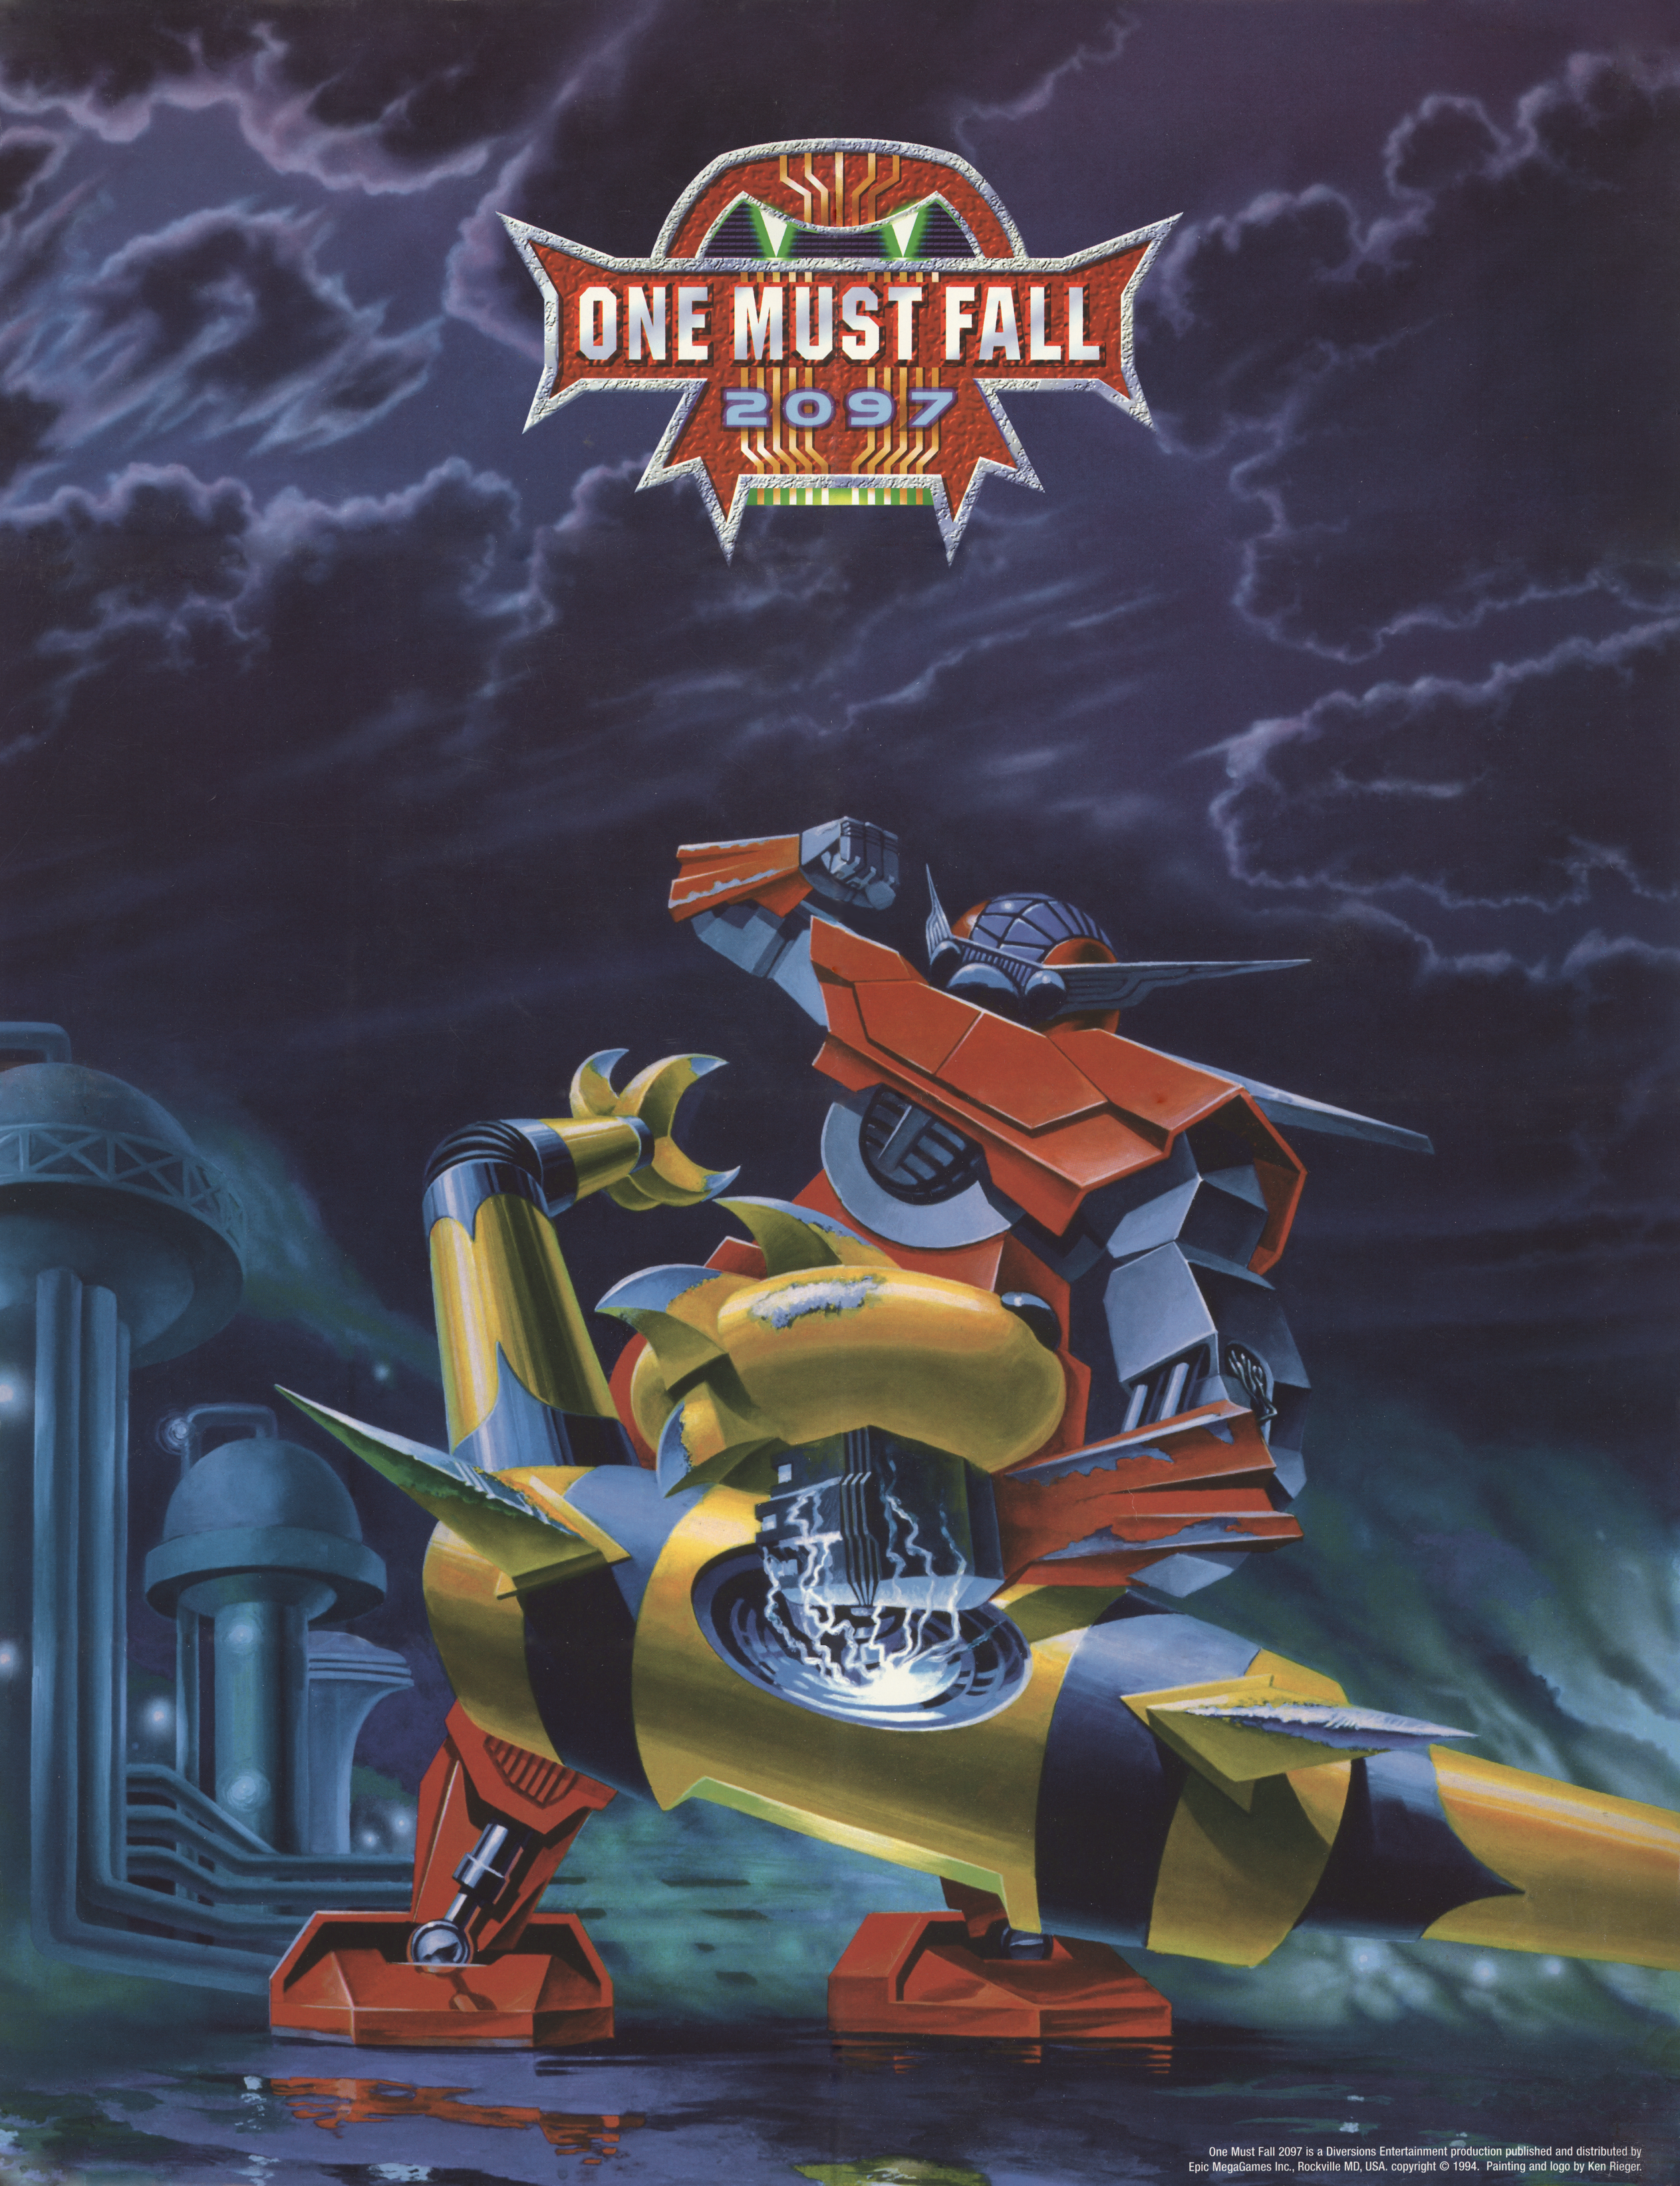
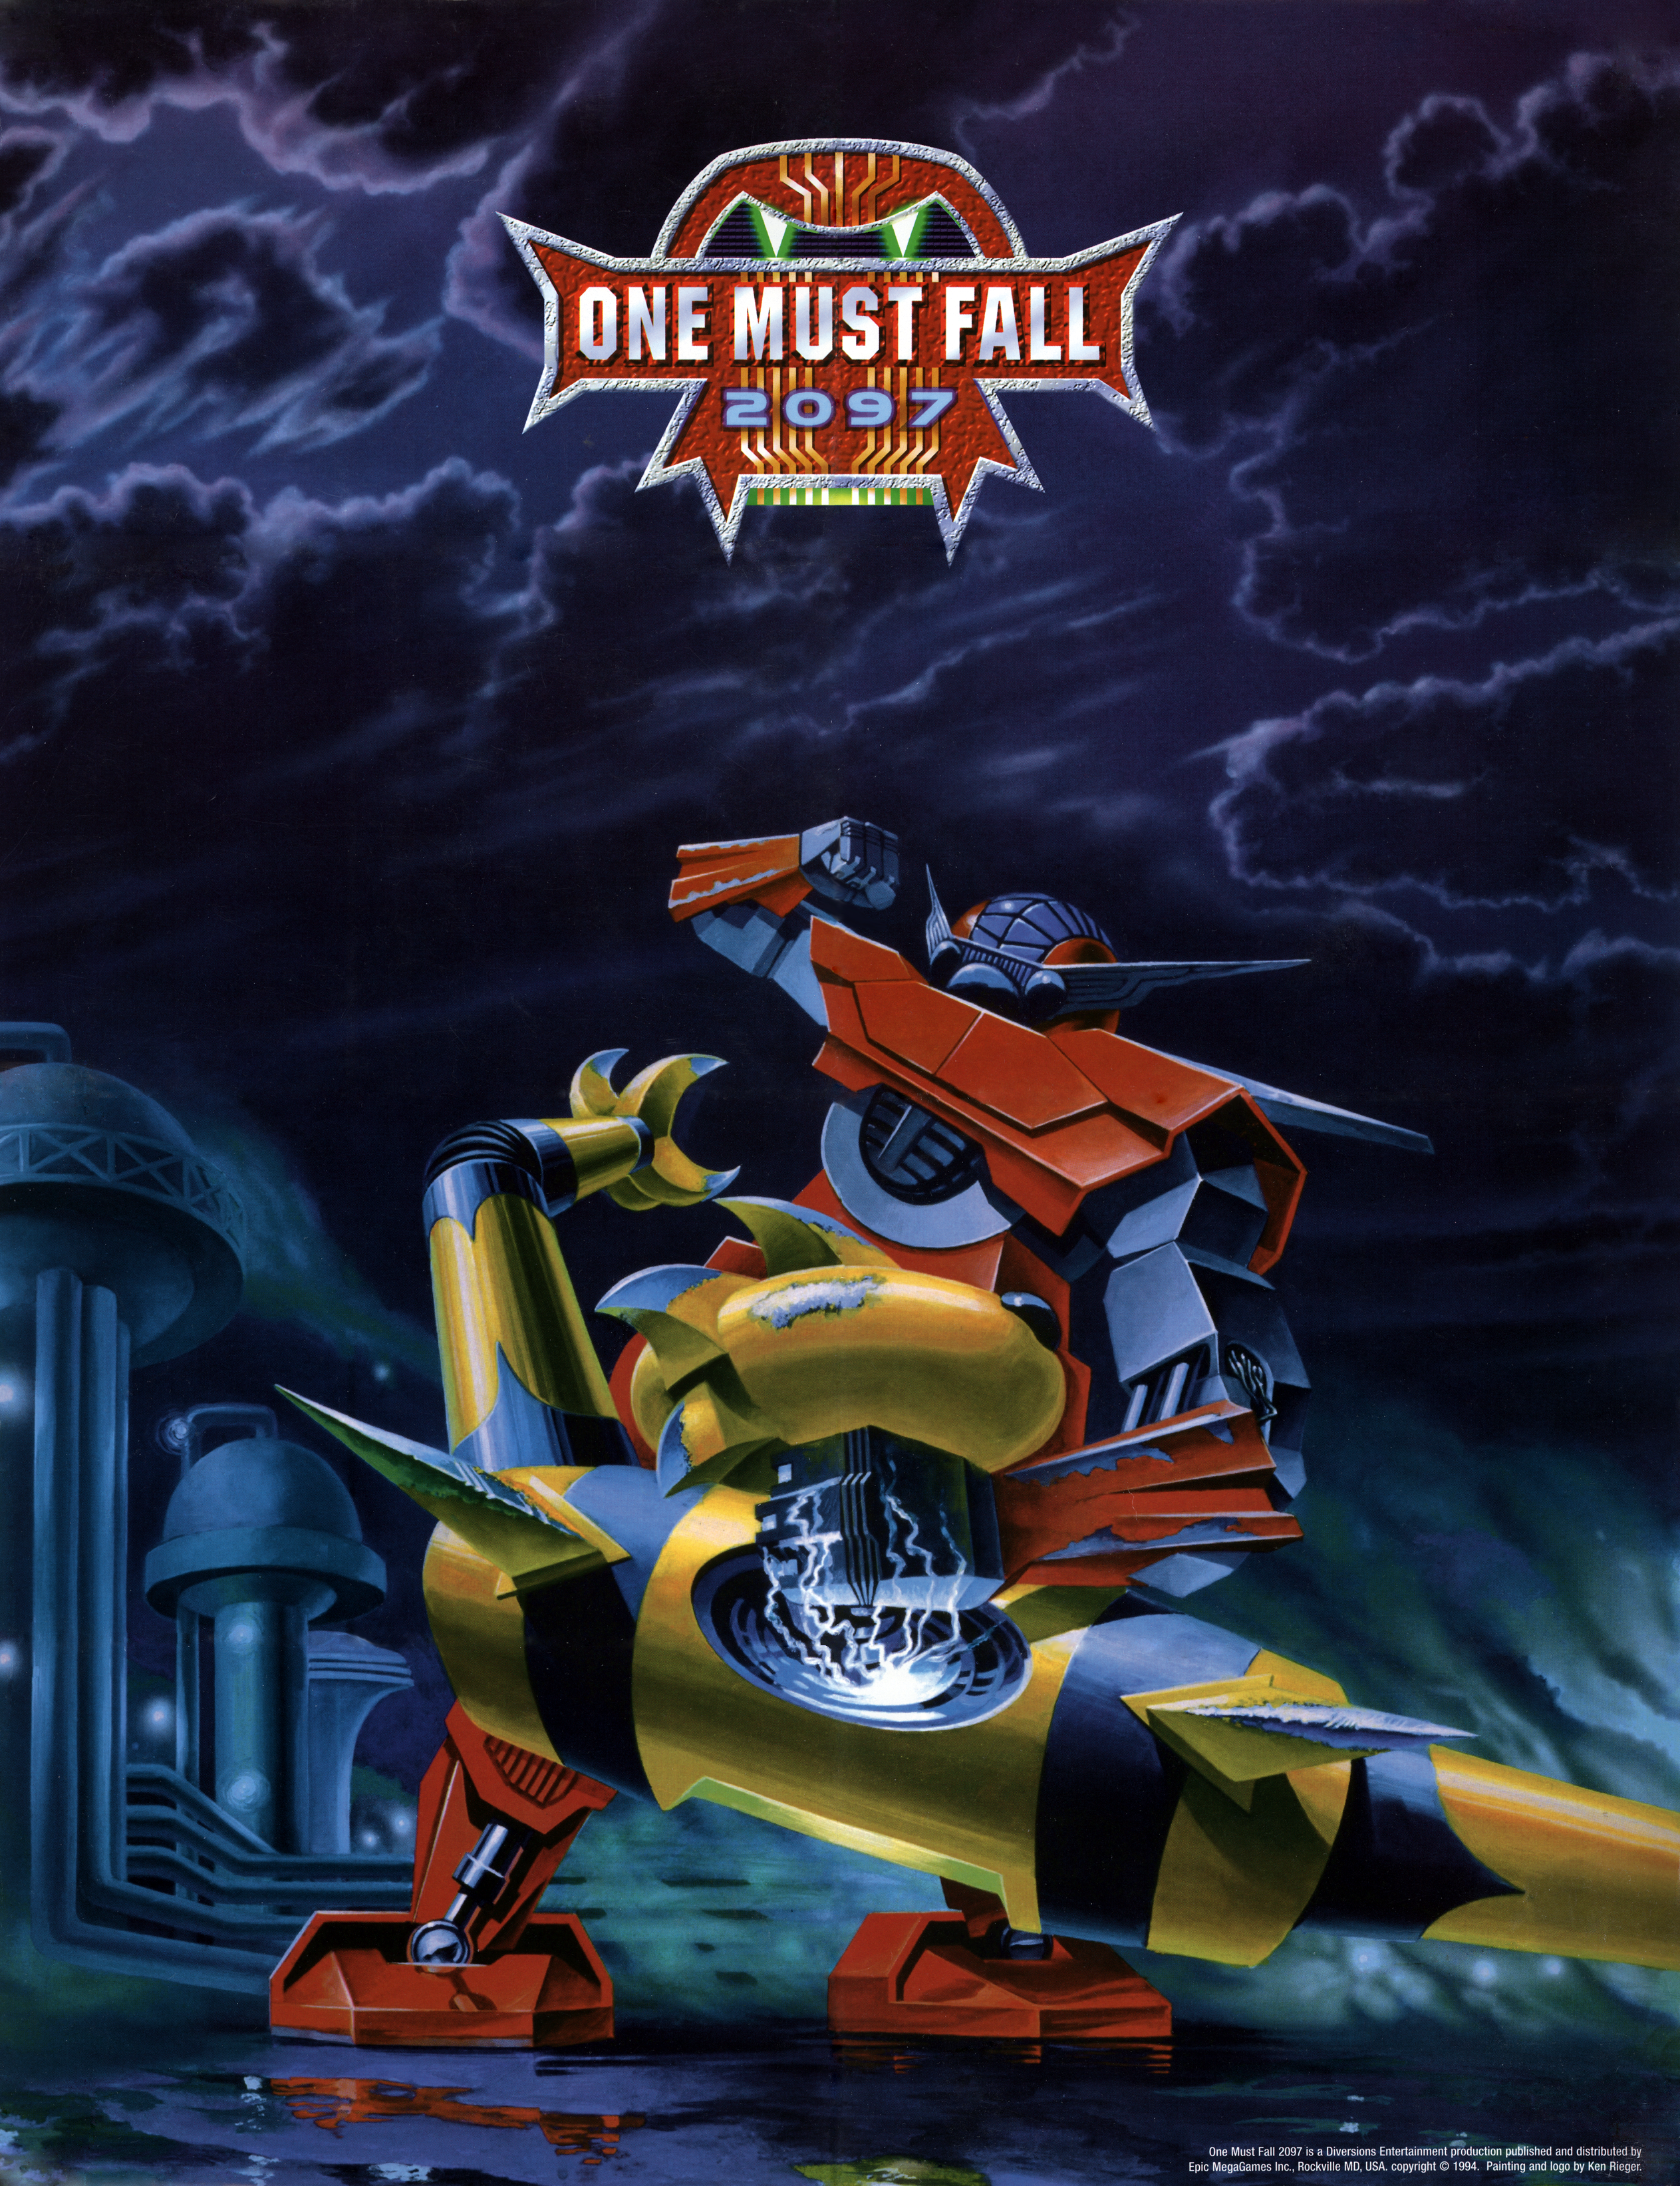
| OMF 2097 Poster - Original Scan | OMF 2097 Poster - Clean |
The original version of One Must Fall 2097 included an awesome poster. I scanned it in with my HP Scanjet 4850. The result wasn't optimal for two reasons. First, the poster was larger than the scanner. I had to scan in each quarter of the poster and then stitch things together. Second, the poster was old and somewhat well-loved - the folds were very visible, and there were a fair number of other defects (such as scratches and staple holes at the corners).
Using Photoshop CS, I eliminated the stitching artifacts and removed the folds and defects that were present in the poster itself. As usual, my primary weapon in this cleanup was the Healing Brush Tool. The most complicated area to clean up was the Shredder's neck - since it's about to be broken by the Nova, it's full of sparks and other complicated stuff. I learned how to use the Healing Brush Tool with the Polygonal Lasso Tool in order to avoid unwanted color bleeding. I also used the Patch Tool, Clone Stamp Tool, and Blur Tool in some small areas.
omf_orig_lg.png (13.4 MB) : Full resolution original scan.
omf_fixed_lg.png (13.3 MB) : Full resolution clean image, before Auto Levels.
omf_levels_lg.png (14.2 MB) : Full resolution clean image, after Auto Levels.
Actually, I took what the scanner emitted and resized its dimensions down by a factor of 4 to produce the "full resolution original scan" here. This didn't completely hide the pattern of dots that the poster was printed with, so no useful information was really lost. The most obvious stitching artifact can be seen where the vertical fold of the poster intersects the Nova's foot.
 |
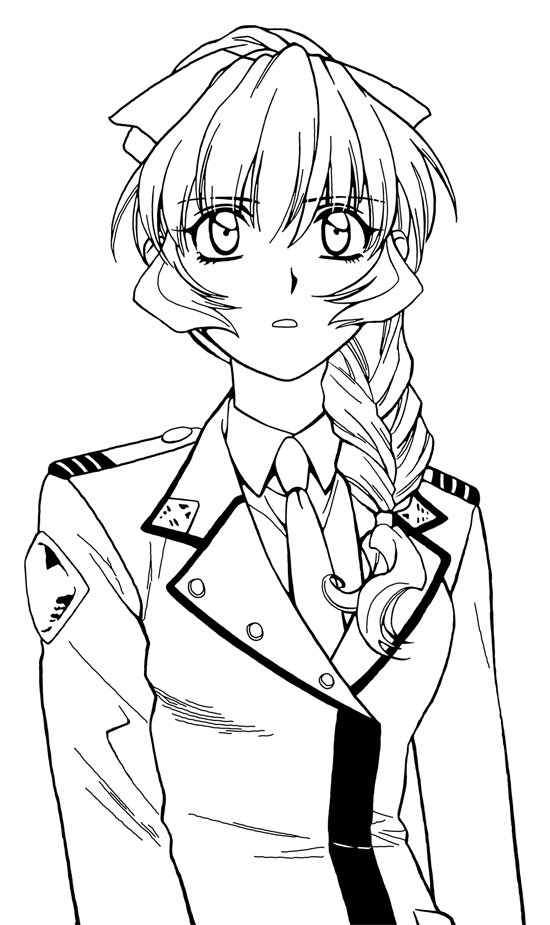 |
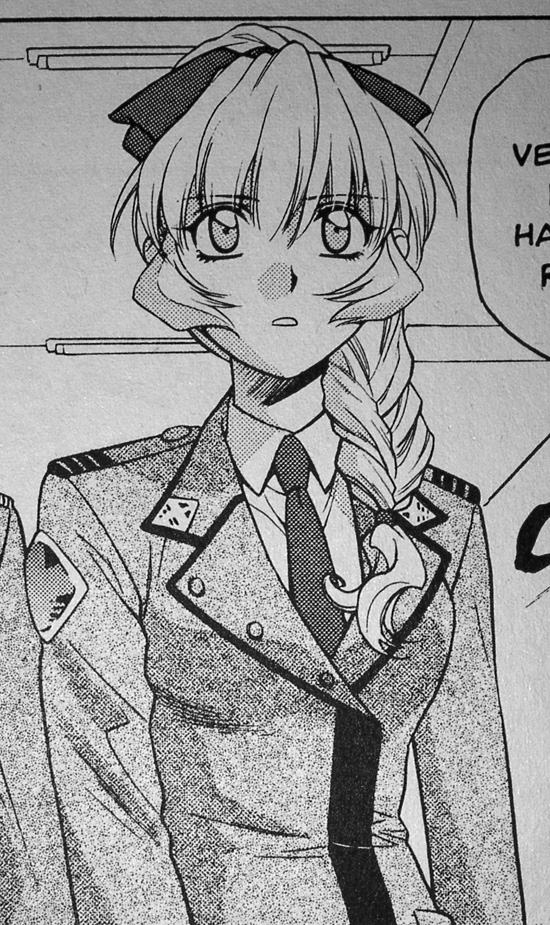
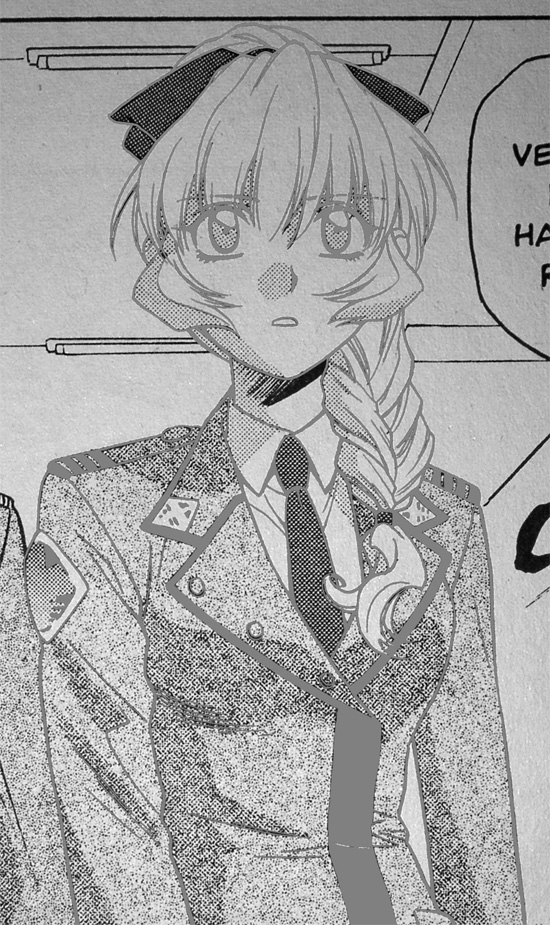
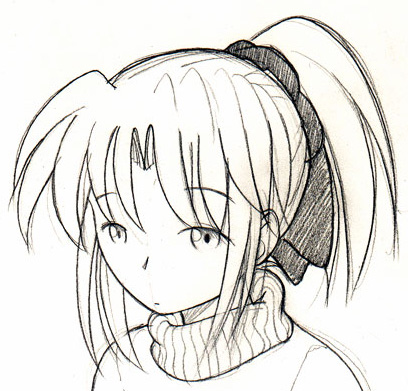
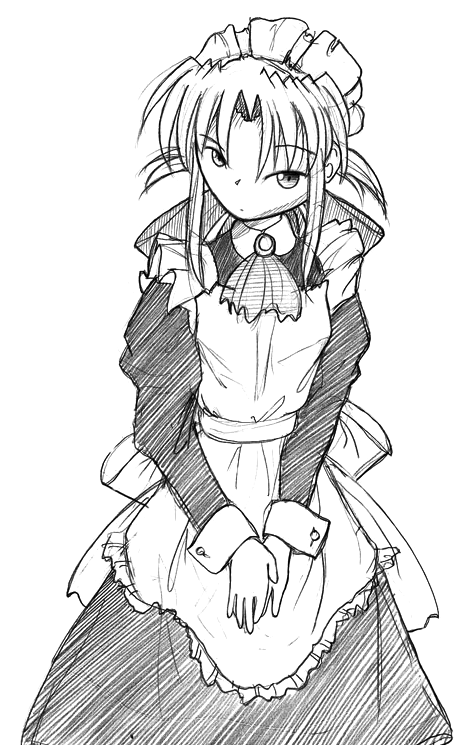
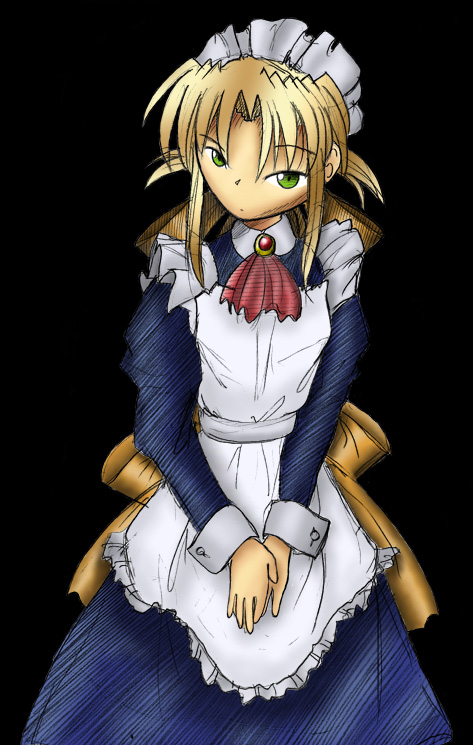
| Theresa - Photo | Theresa - Tracing |
theresa_lines_1x.png (187 KB) : Full resolution tracing.
It's no secret that I adore Theresa Testarossa from the Full Metal Panic anime and manga. I took a photograph of page 132 of Volume 5 of the manga and traced it by hand with a mouse using Photoshop CS. It took a ridiculous amount of time, but I was very pleased with the result. Eventually, I'd like to color this tracing.
My tracing process is extremely mechanical. (It has to be; otherwise, I'd be completely inept at it.) I lightly processed the original photograph, making it grayscale and adjusting its levels to make the lines stand out more from the background, without washing out any small details. In retrospect, I kind of wish I had a scanner; working with a sharper source image of higher resolution would have been somewhat easier. However, the panel is only 8.6 cm tall and my photograph resolved the individual dots used for shading.
theresa_photo.jpg (1.2 MB) : The original photograph from my digital camera.
theresa_levels_1x.jpg (586 KB) : The photograph after processing.
I then increased the processed photograph's width and height by 8x and created a transparent layer above the photograph for me to draw in. (I locked the photograph layer itself, since I didn't want to modify it.) Resizing the photograph to epic dimensions was a clever trick. Using a round hard brush with a diameter of 8 pixels, I was able to trace the smallest details of the image. My usual working brush had a diameter of 16 pixels, but I occasionally used 24 and 32 where the lines were thicker and smoother. When I was done, I resized the image (both the photograph and the tracing above it) to its original size. In this manner, the 8 pixel brush became equivalent to 1 pixel, the 16 pixel brush became equivalent to 2 pixels, and so forth. The trick was that bumps and irregularities in the tracing caused by my mouse jitter were also scaled down, producing an extremely smooth result.
I used a brush color of 0x959595. This gray color let me see both when my tracing wasn't covering enough of the underlying lines, and when it was bleeding outside of the underlying lines. (It also let me see my brush cursor, which is always nice.)
 |
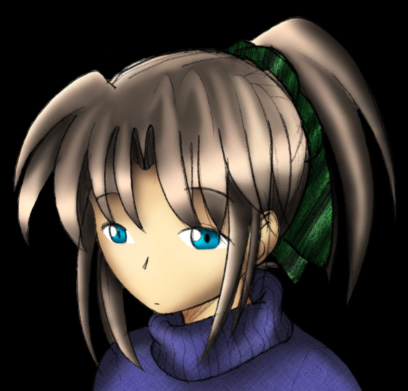
| Theresa - Gray Tracing On Photo |
theresa_traced_8x_partial.jpg (125 KB) : Part of the gray tracing on top of the photograph, after the 8x resizing.
While working on her very complicated hair, I slightly refined my tracing process. I worked at 200% zoom, on top of the 8x resized image. That gave me an extremely fine level of control, while still being able to see a significant portion of the image.
When I was done, I erased and redid her tie and shirt. Finishing her hair had improved my ability to accurately follow the lines of the photograph. Finally, I locked the tracing layer's transparency and filled it with black.
theresa_lines_8x.png (3.2 MB) : The final black/transparent tracing at the resolution I worked in.
Oh, Theresa. Why can't you be real? And wear a damn hat?
 |
|
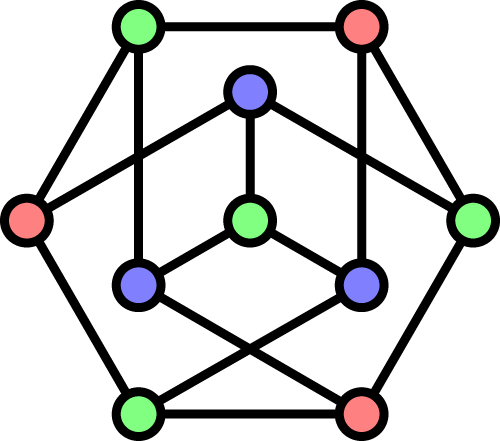
| An unusual embedding of the Petersen graph. | 48x48 Icon |
petersen.ai (425 KB) : The original vector image.
The Petersen graph is very famous in graph theory. It's usually drawn in a pentagonal form, but I saw this hexagonal form at MathWorld - Petersen Graph and liked it more. I used Illustrator CS to create from scratch a vector image of this hexagonal embedding of the Petersen graph. I also 3-colored it (i.e. I assigned each node one of three colors such that no two nodes joined by an edge share the same color). My experience with Illustrator was not pleasant. I found it very hard to express the symmetrical layout of the nodes and edges. Of course, this was my first time using Illustrator.
MathWorld mentions many of the properties of the Petersen graph, and Wikipedia - Petersen Graph mentions more. For example, a path is a sequence of nodes such that each node in the sequence has an edge to the next node in the sequence. A cycle is a path that returns to its starting node. A Hamiltonian path is a path that visits every node exactly once, and a Hamiltonian cycle is a cycle that visits every node exactly once. The Petersen graph has a Hamiltonian path but has no Hamiltonian cycle. Interestingly, it is the smallest hypohamiltonian graph - deleting any single node from it makes it have a Hamiltonian cycle. Deciding whether an arbitrary graph has a Hamiltonian cycle is an NP-Complete problem.
 |
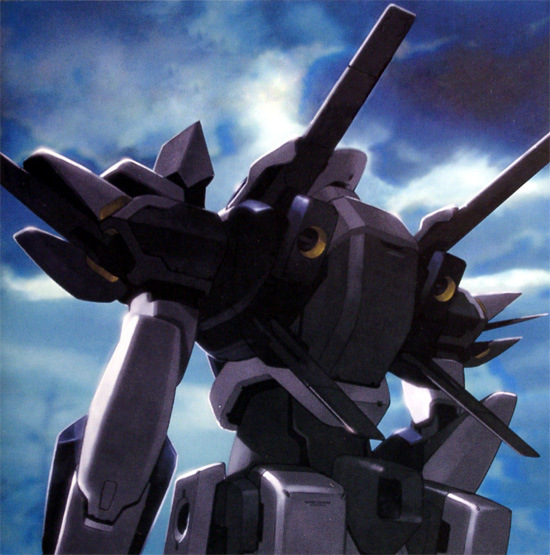 |
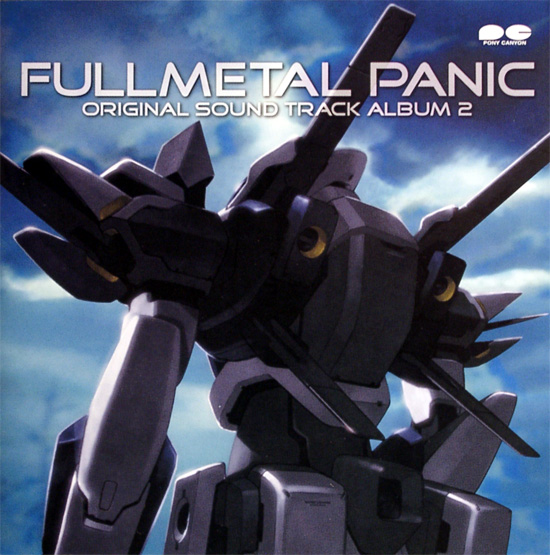
| Original FMP OST 2 Cover | Modified FMP OST 2 Cover |
arx7_orig_1x.jpg (534 KB) : Full resolution original cover.
arx7_1x.jpg (519 KB) : Full resolution modified cover.
I photographed the cover of the second Full Metal Panic soundtrack CD, which depicts an ARX-7 Arbalest with cooling spines extended. I removed the text on the cover using Photoshop 7.
 |
| Traced GCC Logo |
gcc_lg.png (198 KB) : Full resolution tracing.
When I was at Caltech, the logo on GCC's website was a crummy JPEG. I traced it to produce a clean PNG, and they were nice enough to use it. My lines were rather shaky; I became much better at this when I traced Theresa, two years later.
 |
 |
| Original Pentium 4 HyperThreading Logo | Modified Pentium 4 HyperThreading Logo |
p4ht_orig_1x.png (1.8 MB) : Full resolution original logo.
p4ht_1x.png (2.3 MB) : Full resolution modified logo.
I used Photoshop 7 to alter the Pentium 4 HyperThreading logo. The challenge was that I couldn't simply rely on lines to separate different regions of color; I had to work with the layout that was already there.
 |
 |
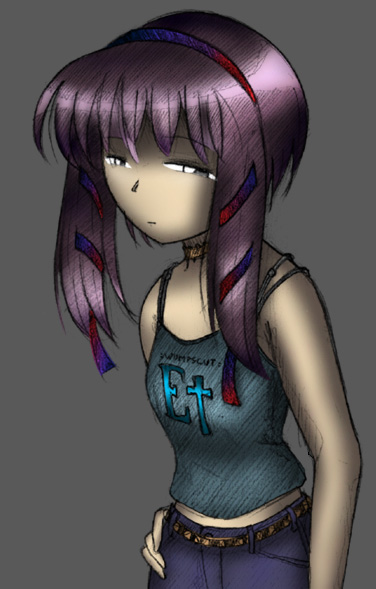
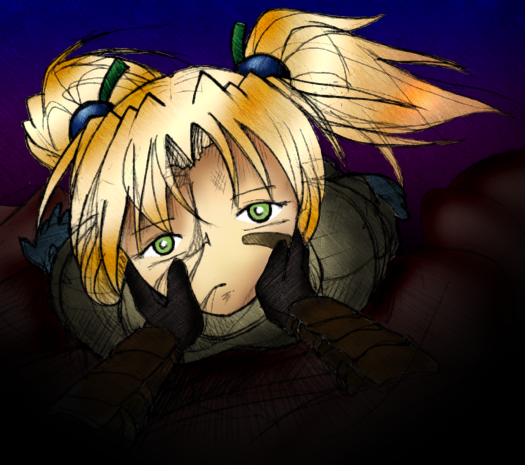
| Original Kimiko Sketch By Fred Gallagher | Colorized Kimiko Sketch |
This is the best colorization that I did before graduating from Caltech. It was the first time that I shaded hair completely by hand.
When I was at Caltech, I colorized sketches using Photoshop 7 with a mouse (not a tablet, which I still don't use). My colorizing process begins by taking the line art and cleaning it up. This involves making it grayscale and attempting to remove JPEG artifacts by slightly compressing the levels. The clean line art then becomes the top layer of the image, set to Multiply.
Next, many Normal layers are created underneath the line art. Each layer is used for a distinct region of color. For example, there's one layer for Kimiko's eyes and another for her bow. In each layer, I use a Brush to fill in that solid region of color. The actual color used doesn't matter; the only thing that matters is staying within the lines. A round hard brush with a diameter of 9 pixels usually works well. Little corners require smaller brushes, down to diameters of 5 and 3 pixels.
Finishing each layer takes a long time, but it's a mechanical process. Having reasonably thick lines in the original line art helps - they hide the edges of each colored region. Mistakes are easily corrected - either undo them in the history, or use the Eraser to erase them to transparency.
Once the flat coloring of each distinct region is finished, I lock the transparencies of the color layers. This is the central trick which allows me to perform shading without going outside the lines. Each layer can be filled with an appropriate flat color for its region. Then I use airbrushing to shade by picking two darker shades for shadows and one lighter shade for highlights. The Smudge tool is a good way to fix things. It's fairly easy to make sharp shadows and highlights and then smudge them into smoothness.
I created the intense highlights and shadows on Kimiko's hair by using Color Burn and Color Dodge. With previous colorizations, I used a radial gradient to fake a proper coloring of the hair.
 |
 |
| Original Dark Looks Sketch By Fred Gallagher | Colorized Dark Looks Sketch |
I like the shading on Miho's shirt.
 |
 |
| Original Pirokomatic Sketch By Fred Gallagher | Colorized Pirokomatic Sketch |
 |
 |
| Original Endgames Turning Sketch By Fred Gallagher | Colorized Endgames Turning Sketch |
This was my second attempt at colorizing a sketch. (My first attempt was horrible.)
https://nuwen.net/image.html (updated 10/2/2012)
Stephan T. Lavavej
Home: stl@nuwen.net
Work: stl@microsoft.com
This is my personal website. I work for Microsoft, but I don't speak for them.